たくさんの自由帳
Androidのお話
たくさんの自由帳
文字数(だいたい) : 30845
目次
本題
先に感想
気になる点
WebGPU とは
おもしろい記事があるからそっちを見てきてください
Canvas が使えないユースケース
余談 media3 と cameraX
OpenGLES と Vulkan
Vulkan 難しすぎ問題
WebGPU
Android に話を戻す
OpenGLES を WebGPUにすると嬉しいこと
モダンな API
なんか GooglePixel は Vulkan なら性能が良いらしい
今回作るもの
もう疲れたので APK だけくれませんか
環境
流れ
WebGPU ライブラリを入れる
ざっくり WebGPU 入門
三角形を書く MainActivity
三角形を書く WebGpuRenderer
三角形が表示できた!
なぜ三角形が表示されるのか
例えば四角形を書くなら?
変換行列
変換行列を使って歪んでいる三角形を直す
回転しようぜ
ここまでのコード全部
万華鏡をつくる
万華鏡用に MainActivity を書き換える
描画するクラスを作る
カメラの準備
万華鏡の頂点の配列
頂点をGPUへ渡す
シェーダーを直す
六角形が映っている!
カメラ映像の話
YUV の話
YUV の 444 とか 420 とかの話
インターリーブの話
YUV だのクロマサンプリングだの意味わかんなすぎ
インターリーブされたデータを元に戻す
GPU へ YUV を送る準備
フラグメントシェーダーで YUV を RGB にする
Wiki じゃない方法
画面に描画する処理
カメラ映像が表示されたけど違う!!!
テクスチャ座標を操作する変換行列
カメラが回転、反転している
各三角形の中にそれぞれ回転したカメラ映像を流したい
完成
全部書いたコード
番外編
本当に Pixel10 シリーズは Vulkan 経由なら一世代前に追いつけるのですか
三角形の数を増やす
ソースコード
おわりに
おわりに2
おわりに3
おわりに4
どうもこんにちは。ディメンション凸ラバース!! 攻略しました。
体験版でかたんちゃんのカップラーメンのくだりまで見て面白くて買った!めちゃめちゃ面白い!めっちゃ作りこまれてそうだった
かたんちゃんルートだけなんかスケールがデカかったのは気のせいなのか私が見過ごしたのか・・
かたんちゃんルートの最後のらんかすたさん、よかったのだわ
いもうとちゃん!!その服後ろがら空きなのでは!?えちえちしーんの言葉がえっちだった

!?!?

そふぃーちゃんのこのかおすき、声かわいい
らんかすたさんのルート分岐だけそれっぽくない(?)名前なのなるほど


・・・まァ

しふくだ!

!?!?!?!?!?!??!!?!?!
ざんねんながらみおさんルートはないわけですが、主人公のお兄ちゃんと妙に仲がいいの、グランドエンディングでわかってはえ~ってなった。
桜ちゃん!?!?かわいい!ちなみにいちばんえちえちでした
ここの返しすき
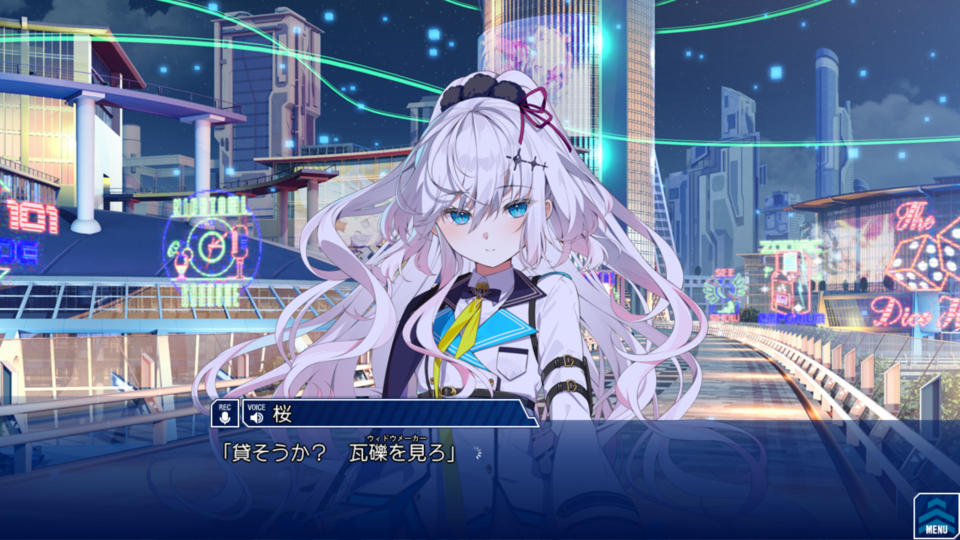
ジト目かわいい
のと初日に惹かれた話が判明するわけですがシリアス展開にならなくてよかった!!
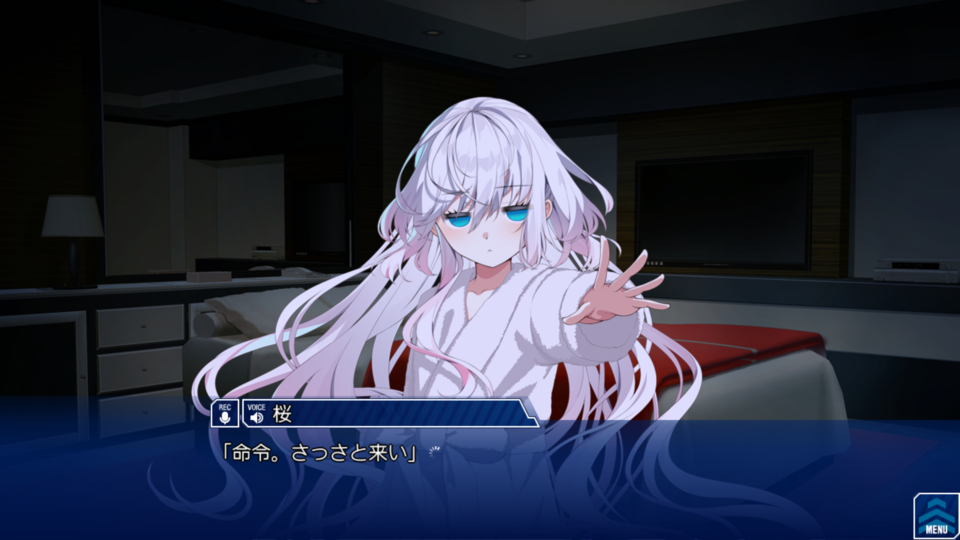


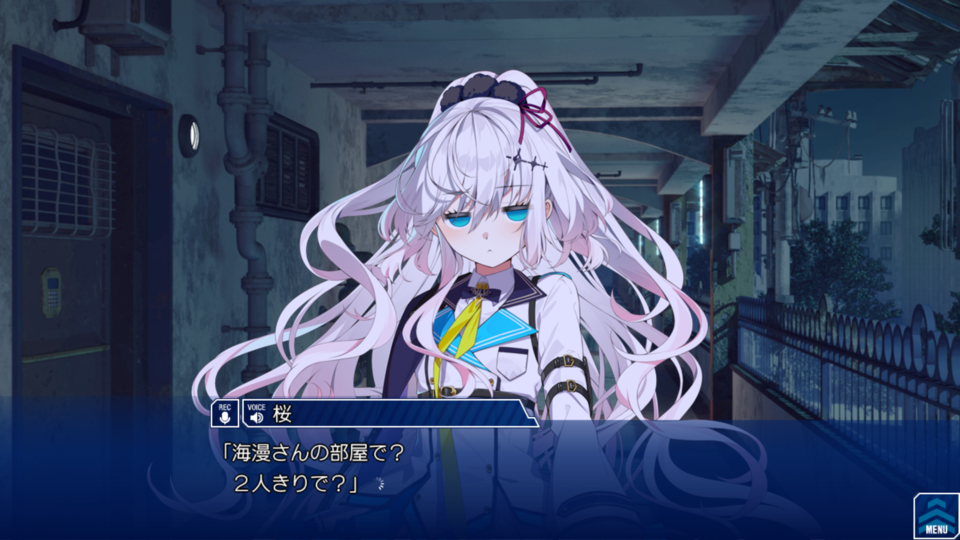
ここのくだりセーブしてある、かわいい
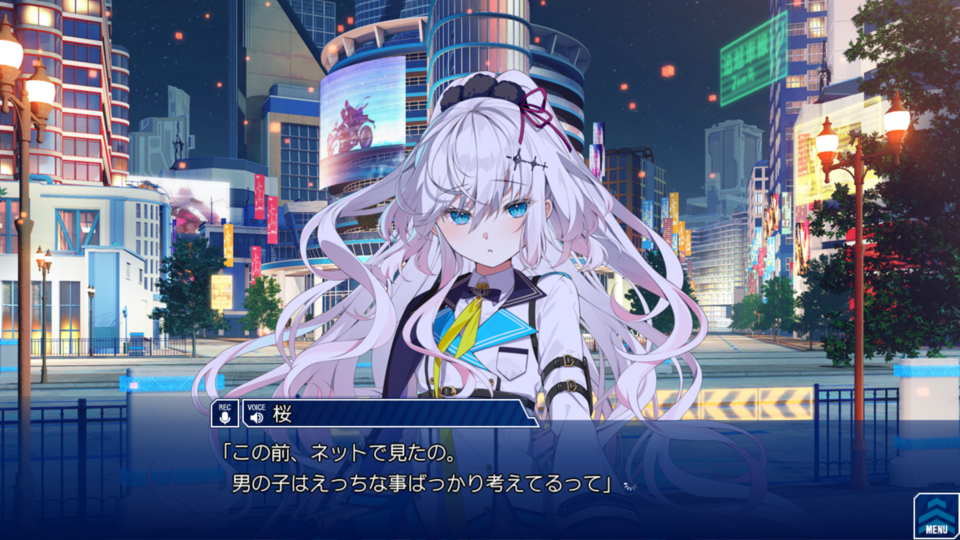
とんちきシーン集
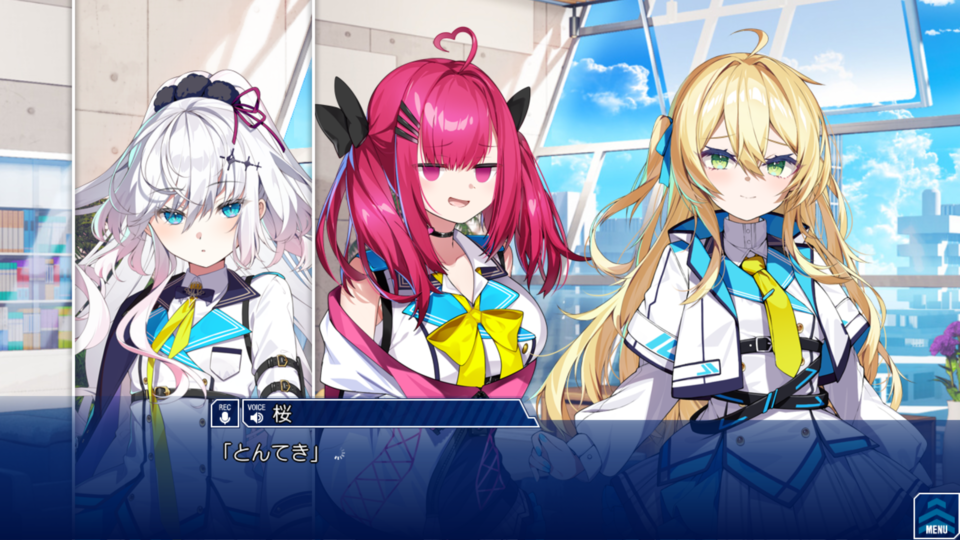
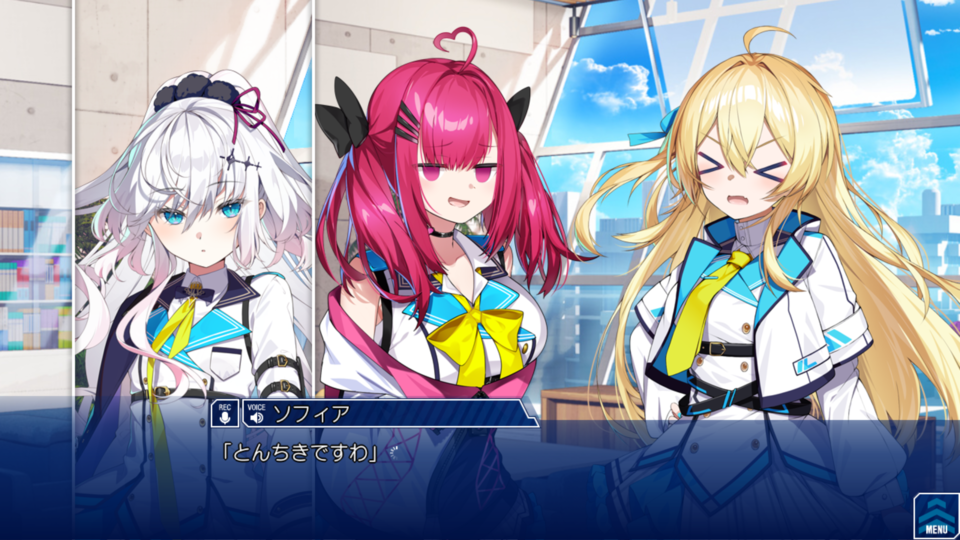
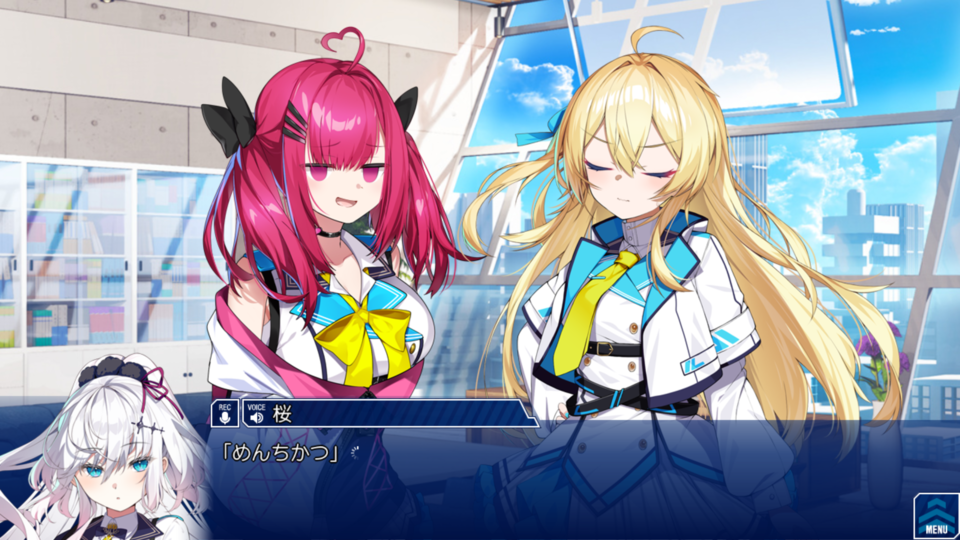
すごいよかった、おすすめ!!
(めっちゃ細かくTIPS書いてあるのあってわらった)
Google I/O 2026は見ましたか!?Androidの発表のGPUの話。
OpenGL ES(GLES)やVulkanは低レイヤーなグラフィックス APIで、これらはGPUに直接指示しないと速度が出ないアプリを作るときに仕方なく使うAPIです。
(なので9割5分のアプリには関係ない話ですね!)(ゲームとかはUnityのゲームエンジンが代わりに叩くので、これらを直接扱うのは稀です!)
発表によるとOpenGL ESを使っているアプリはANGLE(?)が翻訳をしてVulkanで動くようになるらしい、Android 17でなるのか将来の話なのかは分からない。でもSoCのOpenGL ES ドライバーを捨てるとかなんとかはどっかで発表してて気がする。

そしてVulkanを使うための新しい方法があるとのこと!ブラウザに搭載されている低レイヤーグラフィックス APIであるWebGPUが、Androidアプリ開発で使えるように移植された。
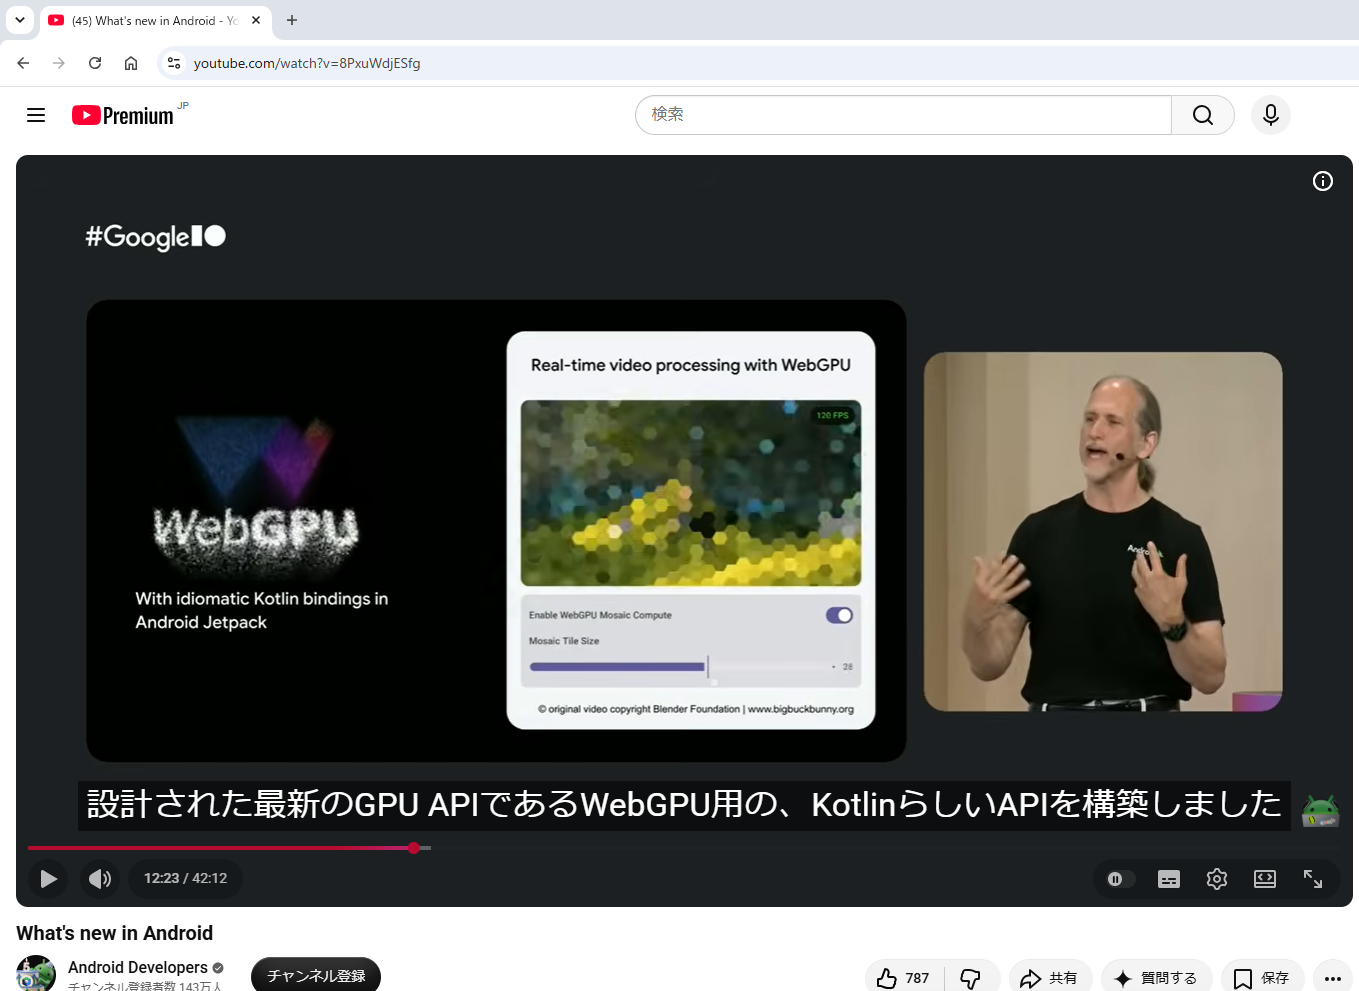
今までよりも高性能で簡潔と言っています、ちょっと試してみましたが本当っぽい!。
というわけで今回はAndroidに移植されたWebGPUでSurfaceViewに描画してみようと思います!
ちなみに、このWebGPU Android 移植版の話の直後にAdobe Premiere Android 版の話をしています。
世の中にあるAndroidの動画編集アプリというのは多分OpenGL ESを使っていて(media3ライブラリがそう)、OpenGL ESの代替であるWebGPUを使っているという話は多分正解な気がします。
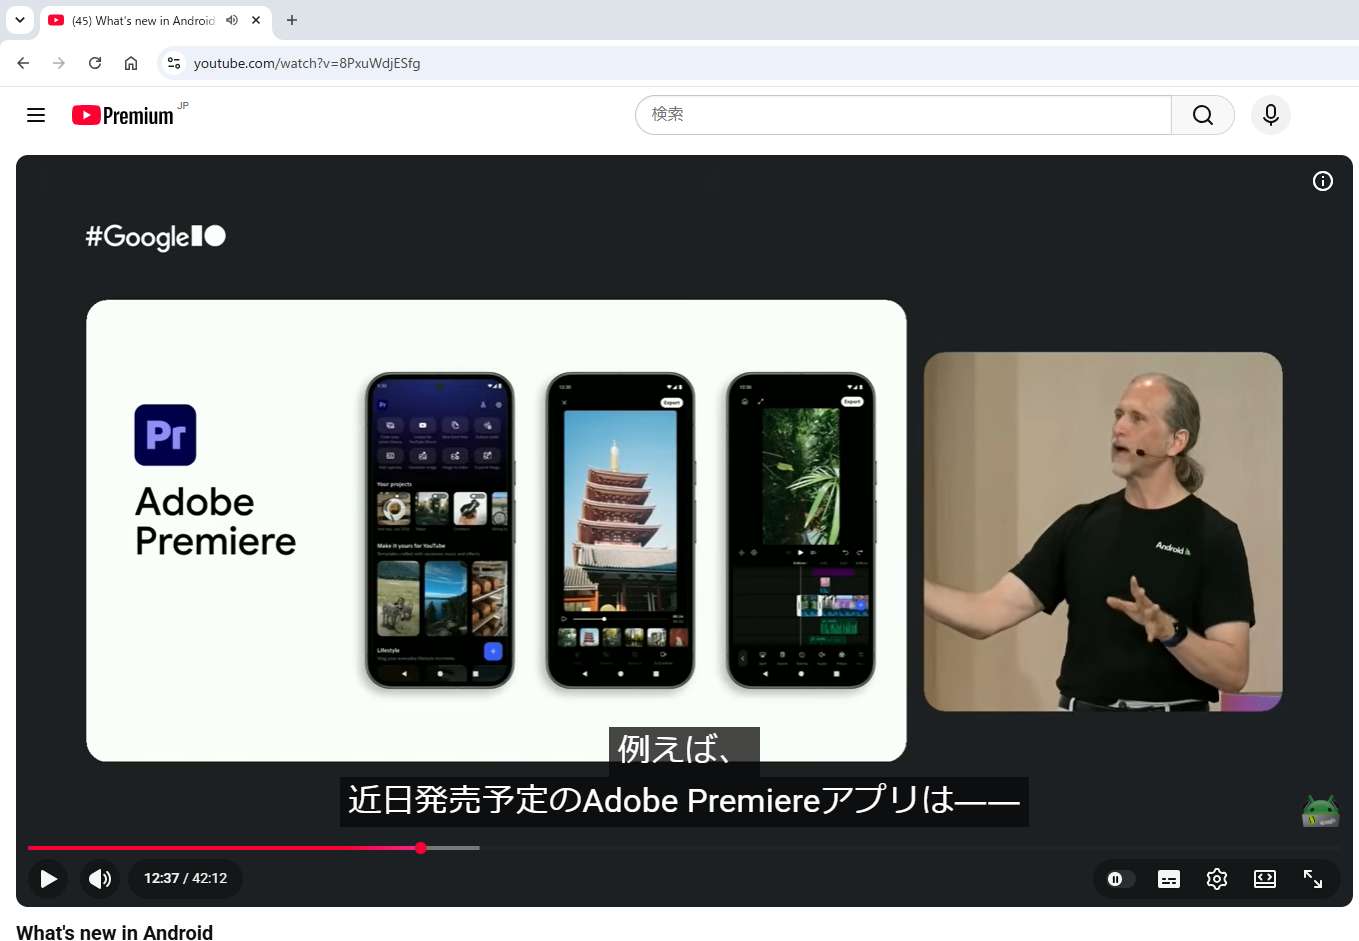
多分正解?なのはalpha段階のWebGPUを本番アプリで使うのは怖くないのかという疑問と、移植されたWebGPUには今のところ動画の映像を渡す特別な方法が存在しない。
後述しますが、OpenGL ESの時はSurfaceTextureクラスを使うことでGPUへカメラ、動画の映像を簡単に渡すことが出来た。一方今の段階のWebGPUにはその機能相当が存在しないハズ。
特別に用意とかされてるのか知らんけど、今のところその機能がないため、普通にテクスチャとして送る必要があって、これは地味にめんどくさい!!(自動ではやってくれないのでYUVからRGBに変換する処理を自分で書かないといけない!)
動画編集であるのに動画の映像を効率よく渡す方法が今のところないWebGPUを使っているのかは微妙・・・
べつに大企業の名前引っ張ってこなくてもすばらしいのにねWebGPU
ドパガキ向け(悪口すぎ)
めちゃめちゃ良いよ、WebGPU。
WGSL文法エラーandroidx.webgpu.ValidationException: Error while parsing WGSL: :49:34 error: expected '}' for function bodyreturn vec4<f32>(color, 1.0);renderPass.draw()の数が違ったandroidx.webgpu.ValidationException: Vertex range (first: 0, count: 27) requires a larger buffer (324) than the bound buffer size (216) of the vertex buffer at slot 0 with stride 12.While encoding [RenderPassEncoder (unlabeled)].Draw(27, 1, 0, 0).While finishing [CommandEncoder (unlabeled)].WGSL組み込み関数の使い方ミスandroidx.webgpu.ValidationException: Error while parsing WGSL: :39:67 error: no matching constructor for 'mat4x4<f32>(mat2x2<f32>)'7 candidate constructors: • 'mat4x4<T ✓ >(mat4x4<T> ✗ ) -> mat4x4<T>' where: ✓ 'T' is 'f32' or 'f16' • 'mat4x4<T ✓ >() -> mat4x4<T>' where: ✗ overload expects 0 arguments, call passed 1 argument ✓ 'T' is 'f32' or 'f16'wgsl、構造体を返すのいいね。in / outみたいなのでtexCoordを渡してたけどstructで返せるのいいね。glslより直感的だと思う、@locationのインデックスで紐づけるの結構いいかも!気軽にuniform変数をリネームできるぜ!GLESとの違いか?glErrorをいつ呼んているのか問題がある。ドローループ?gl呼び出しことに?WebGPUはSurfaceを渡してセットアップできる。難解だからEGLを捨てたい。
OpenGL ESはAndroidにおいてはGLSurfaceViewを使わない場合は、自力でEGLの関数を呼び出す必要がある。複雑すぎてつらいメインスレッド以外だとなんか動かなくない?私のせい?なんかDispatchers.DefaultやnewSingleThreadContext()だと、renderPass.draw()を繰り返し呼び出してしばらく経過すると落ちてる気がする。
スタックトレースは後述、しかもネイティブコードで落ちてんだけど・・
あとカメラ映像や動画の映像を効率よくWebGPUへ渡す方法が今のところ存在しない点です。OpenGL ESのSurfaceTexture、Vulkanのexternal memory + AHardwareBuffer相当がない、見た感じ。一回CPUを経由してからWebGPUに転送するしかなさそうに見える。
今のところはImageReaderをYUV_420_888でテクスチャを転送してみるとかなり高速に動く。
効率が良いかといわれると怪しいけど、コピーするにしてもYUVなので速いのかな。
あーここではゲームに関しては触れません、アプリでどうしてもリアルタイムで映像を加工するみたいな場合を想定しています。
ゲームに関してはUnityとかのゲームエンジンが代わりに低レイヤーグラフィックスAPIを叩いてくれているので。
おもしろい記事があるので私の話よりもこっちを見てきてください。アーカイブにしか存在しないのが本当に惜しい;;なんで;;
WebGPUは低レイヤーなグラフィックス APIです。OpenGL ES(GLES)やVulkanと同じ仲間です。
低レイヤーなため、Canvasにある文字を書くとか線を引く機能はありません。もし低レイヤー APIで文字を書きたい場合は一旦Canvasで書いて画像(テクスチャと呼びたいですね)をGPUに転送しフラグメントシェーダで書くのが一番早いと思います。
基本的にはCanvasを使えばよいわけですが、本当に一部のアプリはCanvasが使えない場合があります。
HDR 動画を編集するとか(いわゆる眩しい動画)
カメラや動画の映像はCanvasではなくSurfaceViewを使い描画するため、Canvasで加工することは出来ません。SurfaceViewが特殊なViewなのはCanvasに書けないからです。
補足すると、速度が出なくてもよい場合はCanvasを頑張って使う方法もあるかと思いますが(映像を1枚1枚画像にするなど)、あまり一般的ではないと思います。(無駄に電池を消費するとか、、)
動画再生ライブラリであるmedia3、Camera2 APIを代わりに叩いてくれるCameraXでは、どちらも映像を加工するのにOpenGL ESを利用しています。
予想でしかないですが彼らもOpenGL ESを書くとつらいはずだから、WebGPUが移植されたのかな~って
というわけでCanvasが使えないとなると何を使うのかというわけですが、OpenGL ESやVulkanですね。
ほかのプラットフォームではDirect3D (Windows)とか、Metal (Apple デバイス)になります。
文字を書くとか図形を書くみたいな機能はもちろん無くて、基本的には三角形を描画することしかできない。GLESとかの練習で三角形が最初に出るのはそういうことです。
三角形なのはこれを組み合わせればどんな図形も立体も書けるから。らしい。
苦労して三角形書いてだから何?って。
三角形を書くためにはいくつかの関数呼び出しと、それとは別にフラグメントシェーダー・バーテックスシェーダーと呼ばれるプログラムを書く必要があります。バーテックスシェーダーが三角形の位置を決めて、フラグメントシェーダーが三角形に色を付けます。
三角形に画像をあてはめたい場合はGPUに画像を転送し、フラグメントシェーダーで画像の色を取り出して色を決定する、、、みたいなことをします。
カメラや動画の映像がなぜ低レイヤーなAPIだと高速に扱えるのかというと、このシェーダーたちは同時に実行されます。
例えば、フルHDの画面なら1920x1080の数だけ色を準備する必要があるわけですが、これらの色を決めるためにに並列でシェーダーを実行することでリアルタイムな描画ができているわけ。すごい!
(ほかにも理由はあると思いますが)
世の中にはshadertoyと呼ばれるサイトがあり、ブラウザ版 OpenGL ESであるWebGLを使いGPUで高速に描画できるのをいいことに、Canvasでは表現できないような力作が投稿されまくっているサイトがあります。
OpenGL ESやVulkanが何なのかはこの通りで、Vulkanは比較的新しいのでOpenGL ESよりも速いらしいです。書いたことがないので分かりませんが。
昔からあるOpenGL ESと、割と新しくて高速なVulkanがあるわけですが、選択肢は一択です。OpenGL ES一択です。(2026年記述時時点、WebGPUが流行ったら変わるかもしれない!)
速いのになぜVulkanを書かないのか?という質問が来ていました。
Vulkan は人間が書くのが無理なほど難しいと言われております。
(OpenGL ESですら難しいのに><)
そもそも難しい上に、AndroidではC++で記述する必要があります。C++!?!??!OpenGL ESはJava/Kotlinから呼び出して描画することが出来たのですが、VulkanではC++を書く必要があります。
(え~Android開発各位は16KB ページサイズが記憶に新しいのでAndroid NDKを用意するのは嫌ですかね・・)
なんかOpenGL ESはスマホアプリで使ってほしそうな雰囲気を感じますが、それと違いVulkanは用途が違うように思えます。
多分ゲームではなくゲームエンジンを作っている、とか、機械学習だから画面出力なしでGPUを使う。みたいな用途のためにこんなにも難しくなっているんでは?
先述のブログ曰く、Metalのがまだマシらしく、Vulkanがとにかく難しいらしい。。
いやなんかMetalのがよさそうじゃないか(隣の芝生は青く何とかかんとか)
もともとはブラウザでOpenGL ESを使えるようにするWebGLという技術があり、その後継としてWebGPUがあります。
作った由来としてはWebGLが出た時点で、すでにOpenGL以外の高性能な選択肢(VulkanやWindowsのDirect3D12やAppleのMetal)があり、これらをブラウザから使うために作られたとかなんとか。
OpenGL ESを大体そのまま移植したWebGLと違い、WebGPUはブラウザで動かすためWindows / Android / Apple デバイスで動かないといけない。
それぞれのプラットフォームにあるグラフィックス APIを呼び出す形なので、Vulkanを置き換えるとかではなく、Vulkanの上で動くことになる。
WebGLと比べてWebGPUの方が高性能ゆえ難しいとされているが、ちょっと書いてみた限りWebGPUの方がモダンなAPIだし分かりやすくない???OpenGL ESよりも罠が少ない気がする。
samplerを要求するんだ~くらいしか引っかかるところがなかった(まあ大したコードを書いていないというのがある)
Androidに話を戻すと、Androidに移植されたWebGPUですが、ゼロから作ったわけではなくChromeにあるWebGPUの実装をAndroidに持ってきたみたいです。
What's New in WebGPU (Chrome 144) | Blog | Chrome for Developers
WGSL subgroup_id and uniform_buffer_standard_layout extensions and WebGPU rolling out on Linux.
https://developer.chrome.com/blog/new-in-webgpu-144
Vulkanの上で動くため、ライブラリをいれるとVulkanを使ったWebGPU実装のネイティブライブラリ(.so)が入ります。
これをJNIを経由してKotlinから叩くことが出来るため、Vulkanを書かずとも高性能を享受できる!という寸法!
人間でも書ける、人間に書いてほしそうなAPIがここにはあります。
何か間違えたら関数呼び出しの箇所で例外を投げてくれます。
OpenGL ESの時はglなんとかかんとか()みたいな関数を呼び出しても失敗したかどうかは分かりません。
失敗したかどうかはGLES20.glGetError()を別に呼び出すことで、さっきの関数呼び出しが失敗しているのかを知ることが出来ます。
なのでGlUtil.checkGlError()みたいなstatic 関数がどのプロジェクトにもあって、これを開発者の気分によって呼び出したり呼び出さなかったりされてる。
(いまだにわからない、OpenGL ESのエラーチェック、どの程度でやってんの?glなんとかかんとか()を呼び出すたびにやってるの?)

そもそもエラーが得られたとして、謎の16進数でエラーを表現するからやる気なくすんだよな。
人間が読めるエラーなんて返してくれません。
WebGPUはマジで良くできていて、失敗した関数呼び出しで例外を投げてくれる。
どこで失敗しているのかがすごくわかりやすい。人間が読めるエラーも出してくれる。バイト数が間違ってるとか、構文が違うとか。親切すぎ。
ほかにも、フラグメントシェーダーやバーテックスシェーダーがコンパイルに失敗しても例外を勝手に投げてくれます。OpenGL ESの時は、コンパイルに失敗したらGLES20.glGetShaderInfoLogを呼び出すことでシェーダーでどこが間違っているかを教えてくれます。逆に呼ばないと迷宮入り。
WebGPUはとにかくエラーが分かりやすいと思います。
あとはWebGPUのシェーダーWebGPU Shading Language (WGSL)も結構よいと思います。
先述のブログ曰く、もともとはAppleとKhronos Groupで会社同士の仲が悪くて作られたものらしい。
見た目がモダンなのを除くと、フラグメントシェーダーとバーテックスシェーダーを1か所に書けるのは結構よいと思いました。
また、頂点の配列をCPUから渡さずにバーテックスシェーダーの中に直接書けるようになってて?(OpenGL ESで出来たっけ?)これは説明をする分や、とりあえず動かす分には分かりやすくてよいと思いました。複雑になるので基本的にはCPUから渡すと思います。
バーテックスシェーダーで構造体を返してフラグメントシェーダーに渡すのもなんか直観的になった気がします。そもそも構造体なんてものが使えるだと・・・!GLSLのvaryingやin / out変数よりもバーテックスシェーダーが返すのが直観的というか(2回目)
まあPixelはゲームを売りにしているわけではないし、ゲームしたいならPixelを選ばないと思うのでどうでもいい話なのはその通りなのですが、、
GooglePixelシリーズはSoCがGoogle Tensorになってから同期のAndroidと比べて特にGPUがイマイチになってます。
特にPixel 10 シリーズにおいては、どういうわけか一つ前の世代よりも性能が悪化しているらしい。
というわけでネットの海をさまよった結果、どうやら OpenGL ES のドライバーがイマイチなだけで、
Vulkan なら一つ前と同じくらいの性能が出るらしい!
ところが、先述の通りVulkanを使うにはC++を書く必要と、すごく難しいであろうAPIを叩くことになるので試すことが出来なかった。
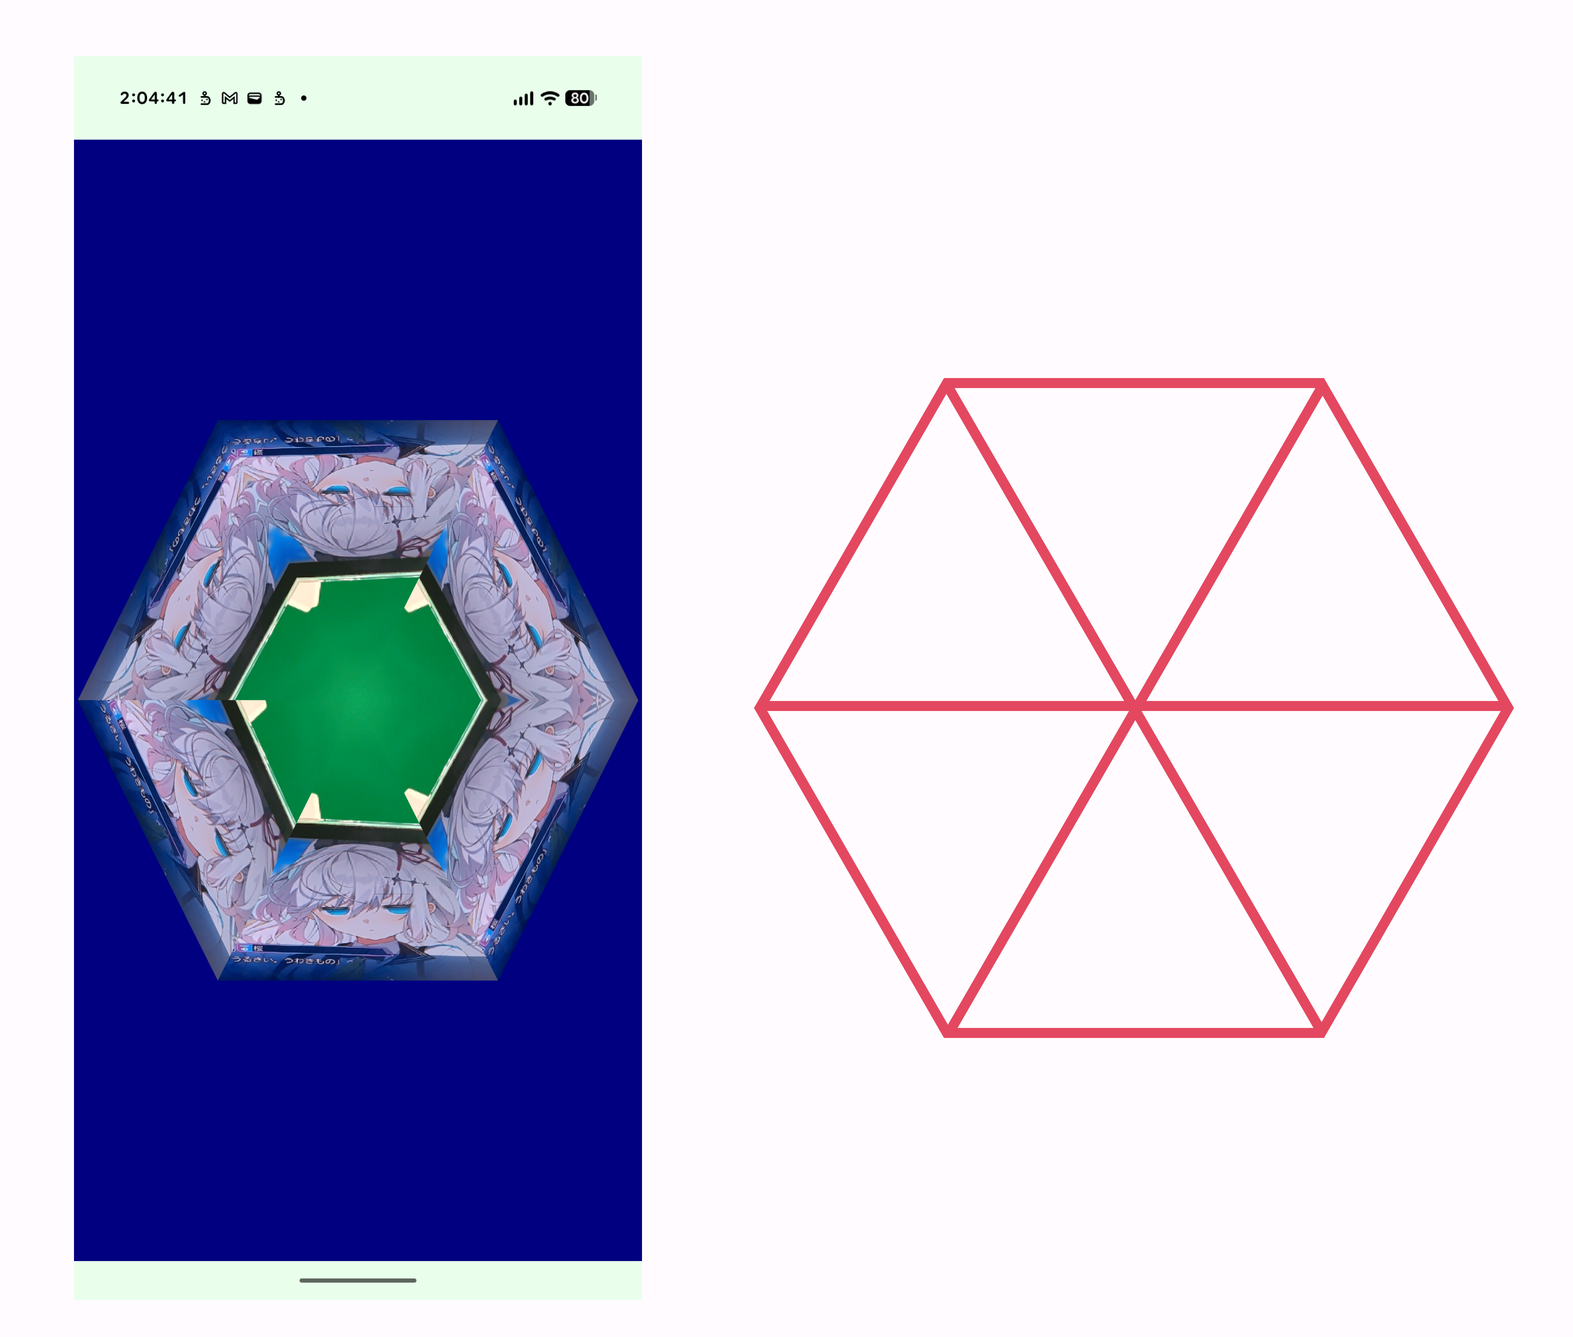
なに作ろうかな~というわけで、万華鏡みたいなのを作ろうかと。
よく見ると三角形を組み合わせて作っているのでそこまで難しくなさそうでいいかもしれない。難しいのはカメラ映像をWebGPUに渡すところかな、、、
はい
| なまえ | あたい |
|---|---|
| Android Studio | Android Studio Quail 3 2026.1.3 |
| たんまつ | Xperia 1 VIII / Pixel Pro Fold 10 |
androidx.webgpu:webgpu | 1.0.0-alpha05 |
app/build.gradle.ktsの中のdependenciesでandroidx.webgpuを入れてください。いまんとこalphaです。
dependencies {
    // WebGPU
    implementation("androidx.webgpu:webgpu:1.0.0-alpha05")

// 以下省略...ココにあります!
わたしも、知ってる限り、できる限り説明します!!OpenGL ESやってなくてもモダンなAPIでやろー
とりあえずWebGpuSurfaceViewとかいうComposableを作り、中身はSurfaceViewを置いただけです。
サンプルコードではAndroidExternalSurfaceを使っているのですが、あんまり信用してない(???)のでAndroidViewで行きます。
SurfaceViewは画面回転とかで再生成されるため、collectLatestを使い描画するためのクラスも破棄して作り直すようにしました。WebGpuRenderer()クラスを作っていないのでエラーになります。この後作ります。
class MainActivity : ComponentActivity() {
    override fun onCreate(savedInstanceState: Bundle?) {
        super.onCreate(savedInstanceState)
        enableEdgeToEdge()
        setContent {
            AndroidWebGpuKaleidoscopeTheme {
                Scaffold(modifier = Modifier.fillMaxSize()) { innerPadding ->
                    WebGpuSurfaceView(modifier = Modifier.padding(innerPadding))
                }
            }
        }
    }
}

@Composable
fun WebGpuSurfaceView(modifier: Modifier = Modifier) {
    val surfaceSize = remember { MutableStateFlow<IntSize?>(null) }
    val surfaceFlow = remember { MutableStateFlow<Surface?>(null) }

    LaunchedEffect(key1 = Unit) {
        // サイズと surface が得られること、得られない場合は return している
        combine(
            surfaceSize,
            surfaceFlow,
            ::Pair
        ).collectLatest { (size, surface) ->
            if (size != null && surface != null) {
                val renderer = WebGpuRenderer()
                try {
                    renderer.init(surface, size.width, size.height)
                    renderer.render()
                } finally {
                    // surface が再生成された、破棄されたとき
                    renderer.cleanup()
                }
            }
        }
    }

    AndroidView(
        modifier = modifier.onSizeChanged { surfaceSize.value = it },
        factory = { context ->
            SurfaceView(context).apply {
                holder.addCallback(object : SurfaceHolder.Callback {
                    override fun surfaceChanged(holder: SurfaceHolder, format: Int, width: Int, height: Int) {
                        // do nothing
                    }

                    override fun surfaceCreated(holder: SurfaceHolder) {
                        surfaceFlow.value = holder.surface
                    }

                    override fun surfaceDestroyed(holder: SurfaceHolder) {
                        surfaceFlow.value = null
                    }
                })
            }
        }
    )
}そういえば、サンプル通りにwithContext(Dispatchers.Default)で描画してると、最初のころはうまく動くんだけど、何回か繰り返しrender()を呼び出していると謎のエラーで落ちるんだけど、これは何?
仕方なく今回はメインスレッドで呼び出しています;;
Fatal signal 11 (SIGSEGV), code 1 (SEGV_MAPERR), fault addr 0x0 in tid 7821 (DefaultDispatch), pid 7763 (webgpumangekyou)
Executable: /system/bin/app_process64
Cmdline: io.github.takusan23.androidwebgpumangekyou
pid: 7763, ppid: 1064, tid: 7821, name: DefaultDispatch  >>> io.github.takusan23.androidwebgpumangekyou <<<
uid: 10470
tagged_addr_ctrl: 0000000000000001 (PR_TAGGED_ADDR_ENABLE)
pac_enabled_keys: 000000000000000f (PR_PAC_APIAKEY, PR_PAC_APIBKEY, PR_PAC_APDAKEY, PR_PAC_APDBKEY)
esr: 0000000092000006 (Data Abort Exception 0x24)
signal 11 (SIGSEGV), code 1 (SEGV_MAPERR), fault addr 0x0000000000000000 (read)
Cause: null pointer dereference

    x0  b400007313869af0  x1  00000070ca330820  x2  0000000000000060  x3  00000070ca330780
    x4  00000070ca3307e0  x5  0000000000000000  x6  0000000000000000  x7  0000000000000000
    x8  0000000000000048  x9  0000000000010000  x10 0000000000000400  x11 0000000000000048
    x12 00000070ca330808  x13 0000000000000001  x14 b400007273877cc0  x15 0000000000000000
    x16 0000000000000000  x17 000000742f6c50c0  x18 00000070c91e8000  x19 00000070ca3308e8
    x20 0000000000000000  x21 00000070ca3307e0  x22 b40000720388fef0  x23 000000003b9f9490
    x24 0000000000000000  x25 00000070ca330780  x26 0000000000000000  x27 0000000000000400
    x28 00000070ca3307e0  x29 00000070ca330720
    lr  00016af12dfb166c  sp  00000070ca3306b0  pc  000000712deddbd8  pst 0000000060001000
    esr 0000000092000006  vg  0000000000000002

51 total frames
backtrace:
      #00 pc 00000000000acbd8  /vendor/lib64/hw/vulkan.powervr.so (CmdPipelineBarrier+40) (BuildId: c5a24e633e33df683ac924d335f0fa5e)
      #01 pc 0000000000180668  /vendor/lib64/hw/vulkan.powervr.so (IMG_vkCmdPipelineBarrier+600) (BuildId: c5a24e633e33df683ac924d335f0fa5e)
      #02 pc 00000000002a5d90  /data/app/~~a9tWnlc2Ui69foMsJvwU-w==/io.github.takusan23.androidwebgpumangekyou-2HqmwQPXD1IXlHvS7R8ZNQ==/base.apk!libwebgpu_c_bundled.so (offset 0xa4000) (BuildId: 3b2a4919ce8bcfa4a301e256d6bcc7ff)
      #03 pc 00000000002a42fc  /data/app/~~a9tWnlc2Ui69foMsJvwU-w==/io.github.takusan23.androidwebgpumangekyou-2HqmwQPXD1IXlHvS7R8ZNQ==/base.apk!libwebgpu_c_bundled.so (offset 0xa4000) (BuildId: 3b2a4919ce8bcfa4a301e256d6bcc7ff)

以下省略...これはサンプル通りで、分かりにくい部分をちょっと改行して分かりやすくしただけです。
このクラスを用意するとMainActivityの方のエラーが消えるので、これで実行してみましょう。
とりあえず三角形を見てから超簡単に解説します。
class WebGpuRenderer {
    private lateinit var webGpu: WebGpu
    private lateinit var renderPipeline: GPURenderPipeline

    suspend fun init(surface: Surface, width: Int, height: Int) {
        // 1. Create Instance & Device
        webGpu = createWebGpu(surface)
        val device = webGpu.device

        // 2. Setup Pipeline (compile shaders)
        initPipeline(device)

        // 3. Configure the Surface
        webGpu.webgpuSurface.configure(
            GPUSurfaceConfiguration(
                device,
                width,
                height,
                TextureFormat.RGBA8Unorm,
            )
        )
    }

    fun render() {
        if (!::webGpu.isInitialized) {
            return
        }

        val gpu = webGpu

        // 1. Get the next available texture from the screen
        val surfaceTexture = gpu.webgpuSurface.getCurrentTexture()

        // 2. Create a command encoder
        val commandEncoder = gpu.device.createCommandEncoder()

        // 3. Begin a render pass (clearing the screen to blue)
        val renderPass = commandEncoder.beginRenderPass(
            GPURenderPassDescriptor(
                colorAttachments = arrayOf(
                    GPURenderPassColorAttachment(
                        GPUColor(0.0, 0.0, 0.5, 1.0),
                        surfaceTexture.texture.createView(),
                        loadOp = LoadOp.Clear,
                        storeOp = StoreOp.Store,
                    )
                )
            )
        )

        // 4. Draw
        renderPass.setPipeline(renderPipeline)
        renderPass.draw(3) // Draw 3 vertices
        renderPass.end()

        // 5. Submit and Present
        gpu.device.queue.submit(arrayOf(commandEncoder.finish()))
        gpu.webgpuSurface.present()
    }

    fun cleanup() {
        if (::webGpu.isInitialized) {
            webGpu.close()
        }
    }

    private fun initPipeline(device: GPUDevice) {
        val shaderCode = """
        @vertex fn vs_main(@builtin(vertex_index) vertexIndex : u32) -> @builtin(position) vec4f {
            const pos = array(vec2f(0.0, 0.5), vec2f(-0.5, -0.5), vec2f(0.5, -0.5));
            return vec4f(pos[vertexIndex], 0, 1);
        }

        @fragment fn fs_main() -> @location(0) vec4f {
            return vec4f(1, 0, 0, 1);
        }
    """

        // Create Shader Module
        val shaderModule = device.createShaderModule(
            GPUShaderModuleDescriptor(shaderSourceWGSL = GPUShaderSourceWGSL(shaderCode))
        )

        // Create Render Pipeline
        renderPipeline = device.createRenderPipeline(
            descriptor = GPURenderPipelineDescriptor(
                vertex = GPUVertexState(
                    shaderModule,
                ),
                fragment = GPUFragmentState(
                    shaderModule,
                    targets = arrayOf(GPUColorTargetState(TextureFormat.RGBA8Unorm))
                ),
                primitive = GPUPrimitiveState(PrimitiveTopology.TriangleList)
            )
        )
    }
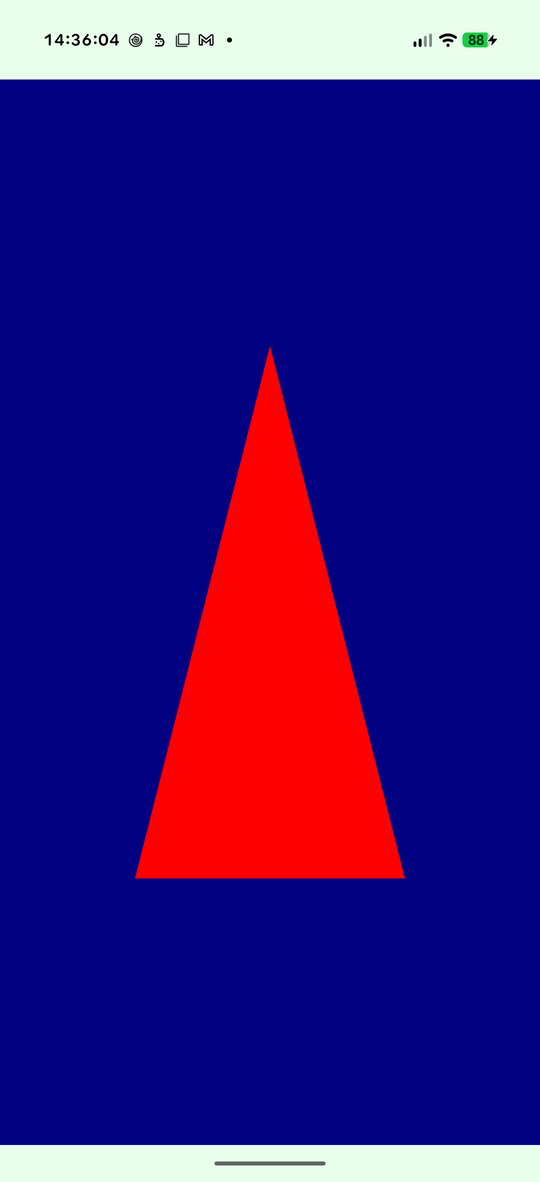
}赤い三角形が表示されてますね!
なんか歪んでない?、スマホが縦長だからそれに追従して縦に長くなってない?
suspend fun init()がWebGPUの初期化をしている箇所です。名前通りイニシャライズですね。
この辺はお作法なので飛ばします。OpenGL ESの時のEGLほにゃららの時よりはるかに分かりやすいAPIだ。
三角形はfun render()で描画をしています。
重要なのはdraw(3)と、initPipeline()のshaderCodeの文字列ですね。それ以外はお作法です(CPUから値を渡すUniformとかが無いシンプルなものなのでもうお作法)
以下のコードがシェーダーと呼ばれるもので、Rustっぽい雰囲気(変換できる)を感じますね!。WebGPU Shader Language (WGSL)と呼びます。
この関数たちはGPU側で動作します。それっぽくなってきましたね!
@vertex fn vs_main(@builtin(vertex_index) vertexIndex : u32) -> @builtin(position) vec4f {
    const pos = array(vec2f(0.0, 0.5), vec2f(-0.5, -0.5), vec2f(0.5, -0.5));
    return vec4f(pos[vertexIndex], 0, 1);
}

@fragment fn fs_main() -> @location(0) vec4f {
    return vec4f(1, 0, 0, 1);
}draw(3)を呼び出すと、3なので三回vs_main()関数が呼び出されます。引数のvertexIndexがそれぞれ0,1,2で呼び出される感じですね。
これはバーテックスシェーダーと呼ばれています。位置を決めるのに使われます。
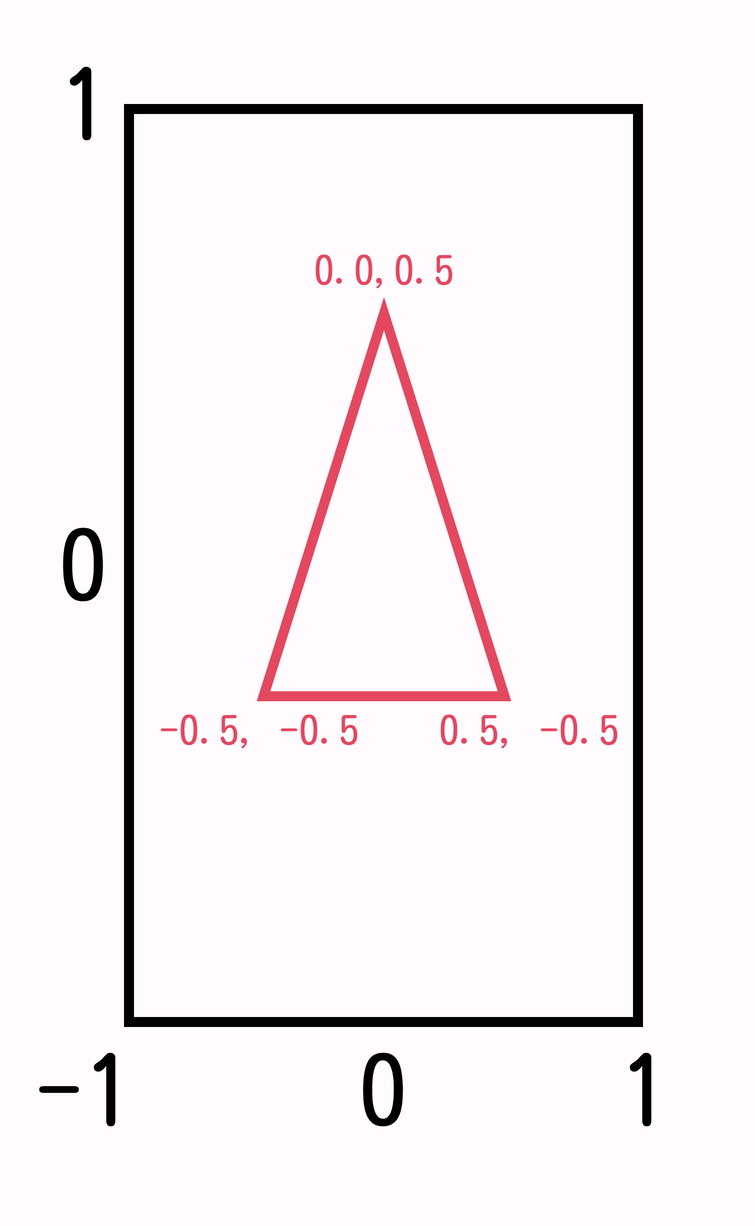
const pos = array(...)が、三角形の頂点の座標です。0.5という数字は、WebGPUの座標系による数字です。(OpenGL ESの時と同じような感じですが)
というのも、WebGPUはX/Y 座標が1280とか720とかではなく、-1から1の範囲に正規化されます。三角形を見た時に縦に長くなっていると思ったと思いますが、これは縦も横も-1から1の範囲に無理やり押し込まれているからなんですね。
縦の-1 ~ 1と、横の-1 ~ 1が異なるため、縦長になってしまう。
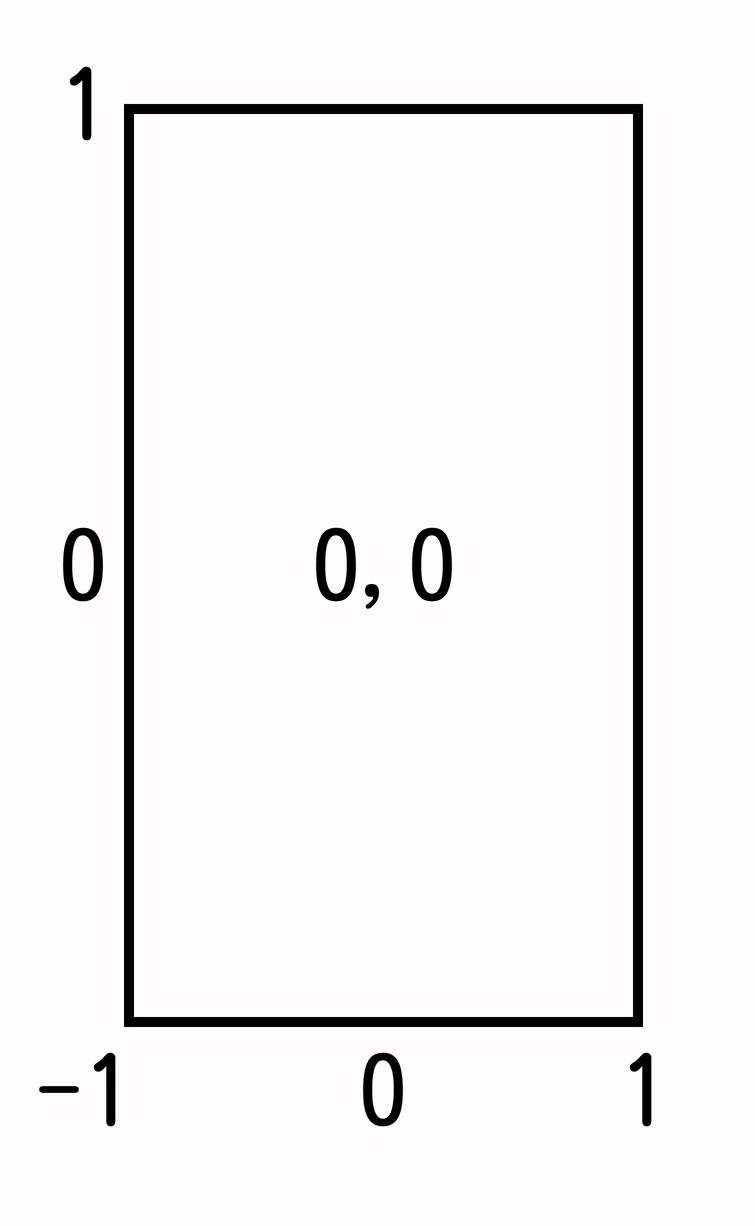
コードのconst pos = array(vec2f(0.0, 0.5), vec2f(-0.5, -0.5), vec2f(0.5, -0.5));だと
x=0で、y=0.5(上)x=-0.5で、y=0.5(左下)x=0.5で、y=-0.5(右下)となります。pos[vertexIndex]でそれぞれの配列から取り出してreturnしているので、これで三角形が書けます。
次はfs_main()が呼びだされます。フラグメントシェーダーと呼ばれています。これは色を決める関数です。各ピクセルに対して呼ばれるわけですね!
が、ここでは省略するためvec4f(1, 0, 0, 1);を常に返していますね。vec4はそれぞれ赤色, 緑色, 青色, 透明度の順番で0から1の値を取ります。この例では赤(と透明)だけが1なので、赤色になります。
画像を表示するとかの場合はここに書けばよいわけですね!
四角形はよく見てみると、縦に長くした三角形を並べて二つ描画することで四角形が描画できるということに気付きますね!
というわけで、draw(6)にして(三角形を二つ書くため)、頂点の配列をこんな感じにすることで四角形を描画することが出来るはずです。
const pos = array(
    vec2<f32>(-1.0, -1.0), // 左下
    vec2<f32>( 1.0, -1.0), // 右下
    vec2<f32>(-1.0,  1.0), // 左上
    vec2<f32>(-1.0,  1.0), // 左上
    vec2<f32>( 1.0, -1.0), // 右下
    vec2<f32>( 1.0,  1.0)  // 右上
);コンピューターグラフィックの世界ではカメラ?とかの専門用語があるみたいなのですが、まあよく分からないんため、ここでは変換行列と呼ぶことにします。
三角形が歪んでいます。これは先述の通りスマホの画面が縦長ゆえに、縦の-1 ~ 1と横の-1 ~ 1が違うことが原因です。
(なのでたまたま正方形なら問題ないかもしれません)
三角形を動かしたり、サイズを変えたり、スケールを変えたりすることが出来るFloat 型を 16 個取る魔法みたいな配列があります。これが変換行列ですね。コンピューターグラフィックスの世界においては配列と呼ぶより、ベクトルや行列と呼んだ方が正しいかもしれません。
専門じゃないので本当によく分からないわけですが、OpenGL ESやWebGPUのシェーダーでは配列と配列の足し算引き算掛け算割り算が文字通り出来るようになってます。vec4f() * vec4f()みたいな。そのままだね。
そして、先述の三角形の頂点と変換行列を掛け算することで、さっきの三角形を回転させたり、移動させたり、スケールを変えて横に引き延ばしたりできます。
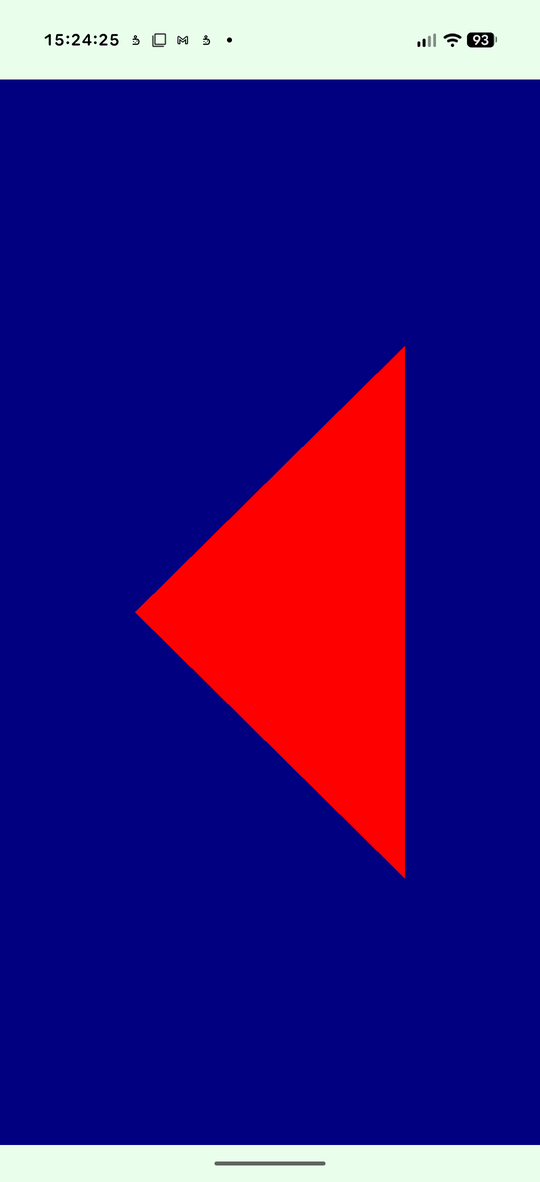
例えば三角形を90度傾けてみる場合はこんな感じ。
回転するだけな、変換行列は2x2で4つのfloat配列で済むらしい。
@vertex fn vs_main(@builtin(vertex_index) vertexIndex : u32) -> @builtin(position) vec4f {
    const pos = array(vec2f(0.0, 0.5), vec2f(-0.5, -0.5), vec2f(0.5, -0.5));

    // WGSL 側で回転行列を作る
    let camera_cosTheta = cos(radians(90));
    let camera_sinTheta = sin(radians(90));
    let rotate_matrix = mat2x2f(
        vec2f(camera_cosTheta, camera_sinTheta),
        vec2f(-camera_sinTheta, camera_cosTheta)
    );

    // 回転する
    let xy = pos[vertexIndex];
    let position = rotate_matrix * xy; // ベクトル同士の掛け算!

    return vec4f(position, 0, 1);
}
ところで、変換行列は作るのが難しいため(正直に言うと↑の回転する行列はAIに書いてもらった)、自力では書かないと思います。変換行列で調べるとなんだか怖い数式が出ますが、わたしたちは自力では書きません。
代わりにAndroidにはandroid.opengl.Matrixクラスが存在し、16個のFloatを持つ配列を渡すだけで、好きなように移動させたり回転させたりする行列を書いてくれます!やったぜ!
しかしこれを使うにはCPUとGPUのメモリを超える必要があります。Kotlinで作った行列をWebGPUに渡す必要があります。
まずは変数を宣言します。transformMatrixUniformBufferとbindGroupです。
private lateinit var webGpu: WebGpu
private lateinit var renderPipeline: GPURenderPipeline

// 変換行列を渡す
private lateinit var transformMatrixUniformBuffer: GPUBuffer
private lateinit var bindGroup: GPUBindGroup

private var width = 0
private var height = 0次に、initPipeline()関数の中に書き足します。lateinit varに代入します。
private fun initPipeline(device: GPUDevice) {

    // 省略...

    // CPU から値を渡す準備
    transformMatrixUniformBuffer = device.createBuffer(
        GPUBufferDescriptor(
            size = 64,
            usage = BufferUsage.Uniform or BufferUsage.CopyDst
        )
    )
    bindGroup = webGpu.device.createBindGroup(
        descriptor = GPUBindGroupDescriptor(
            layout = renderPipeline.getBindGroupLayout(0),
            entries = arrayOf(
                GPUBindGroupEntry(binding = 0, buffer = transformMatrixUniformBuffer)
            )
        )
    )
}同様にwidthとheightはinit()関数で代入するようにしました。
suspend fun init(surface: Surface, width: Int, height: Int) {
    this.width = width
    this.height = height

    // 以下省略...
}次にシェーダーを修正します。CPUから受け取った行列を使えるようにしているのが@group(0) @binding(0) var<uniform> transformMatrix: Uniforms;ですね。
型はstruct Uniforms { ... }を使っています。今回はシンプルにベクトルを一つだけ定義してます。
構造体なので複数の値を定義してCPUからGPUへ値を渡すことが出来ますが、もしそうする場合はdevice.createBuffer()で構造体が使うメモリの量をちゃんと計算して、
後述するdevice.queue.writeBuffer()でデータをつなげる必要があると思います。
また行列を適用できるように、バーテックスシェーダーでvec4f(pos[vertexIndex], 0, 1)をreturnする前に、変換行列を掛け算を追加します。
見てもらえばわかるかと思いますが本当に掛け算です。
    val shaderCode = """
    // Uniforms 構造体
    struct Uniforms {
        matrix: mat4x4<f32>,
    }

    // CPU から受け取る
    @group(0) @binding(0) var<uniform> transformMatrix: Uniforms;

    @vertex fn vs_main(@builtin(vertex_index) vertexIndex : u32) -> @builtin(position) vec4f {
        const pos = array(vec2f(0.0, 0.5), vec2f(-0.5, -0.5), vec2f(0.5, -0.5));
        let transformedVec = vec4f(pos[vertexIndex], 0, 1) * transformMatrix.matrix; // 変換行列を適用
        return transformedVec;
    }

    @fragment fn fs_main() -> @location(0) vec4f {
        return vec4f(1, 0, 0, 1);
    }
"""これでCPUからGPU (シェーダー)側へ配列(ベクトル、行列)を渡せるようになりました。
次はMatrixクラスを使って変換行列を用意します。
まずはFloatの配列をByteBufferに変換する拡張関数を書きました。Floatの配列ではなくByteBufferでやり取りするみたいなので。
private fun FloatArray.toByteBuffer(): ByteBuffer {
    val bufferSize = this.size * Float.SIZE_BYTES
    val byteBuffer = ByteBuffer.allocateDirect(bufferSize)
        .order(ByteOrder.nativeOrder())
        .also { byteBuffer -> byteBuffer.asFloatBuffer().put(this).rewind() }
    return byteBuffer
}render()関数でGPUに転送しますか、render()関数で変換行列を作ってGPUに転送します。
fun render() {
    if (!::webGpu.isInitialized) {
        return
    }

    val gpu = webGpu

    // 変換行列を用意
    // 三角形が歪まないようにする
    val transformMatrix = FloatArray(16)
    Matrix.setIdentityM(transformMatrix, 0)
    // WebGPU 側を正方形にする、SurfaceView は画面いっぱいなので縦長のママだが、見切れる前提で正方形にする。これで三角形が歪まなくなる
    if (width < height) {
        val scale = (height / width.toFloat())
        Matrix.scaleM(transformMatrix, 0, scale, 1f, 1f)
    } else {
        val scale = (width / height.toFloat())
        Matrix.scaleM(transformMatrix, 0, 1f, scale, 1f)
    }
    // GPU に転送
    gpu.device.queue.writeBuffer(transformMatrixUniformBuffer, 0, transformMatrix.toByteBuffer())

    // 以下省略...
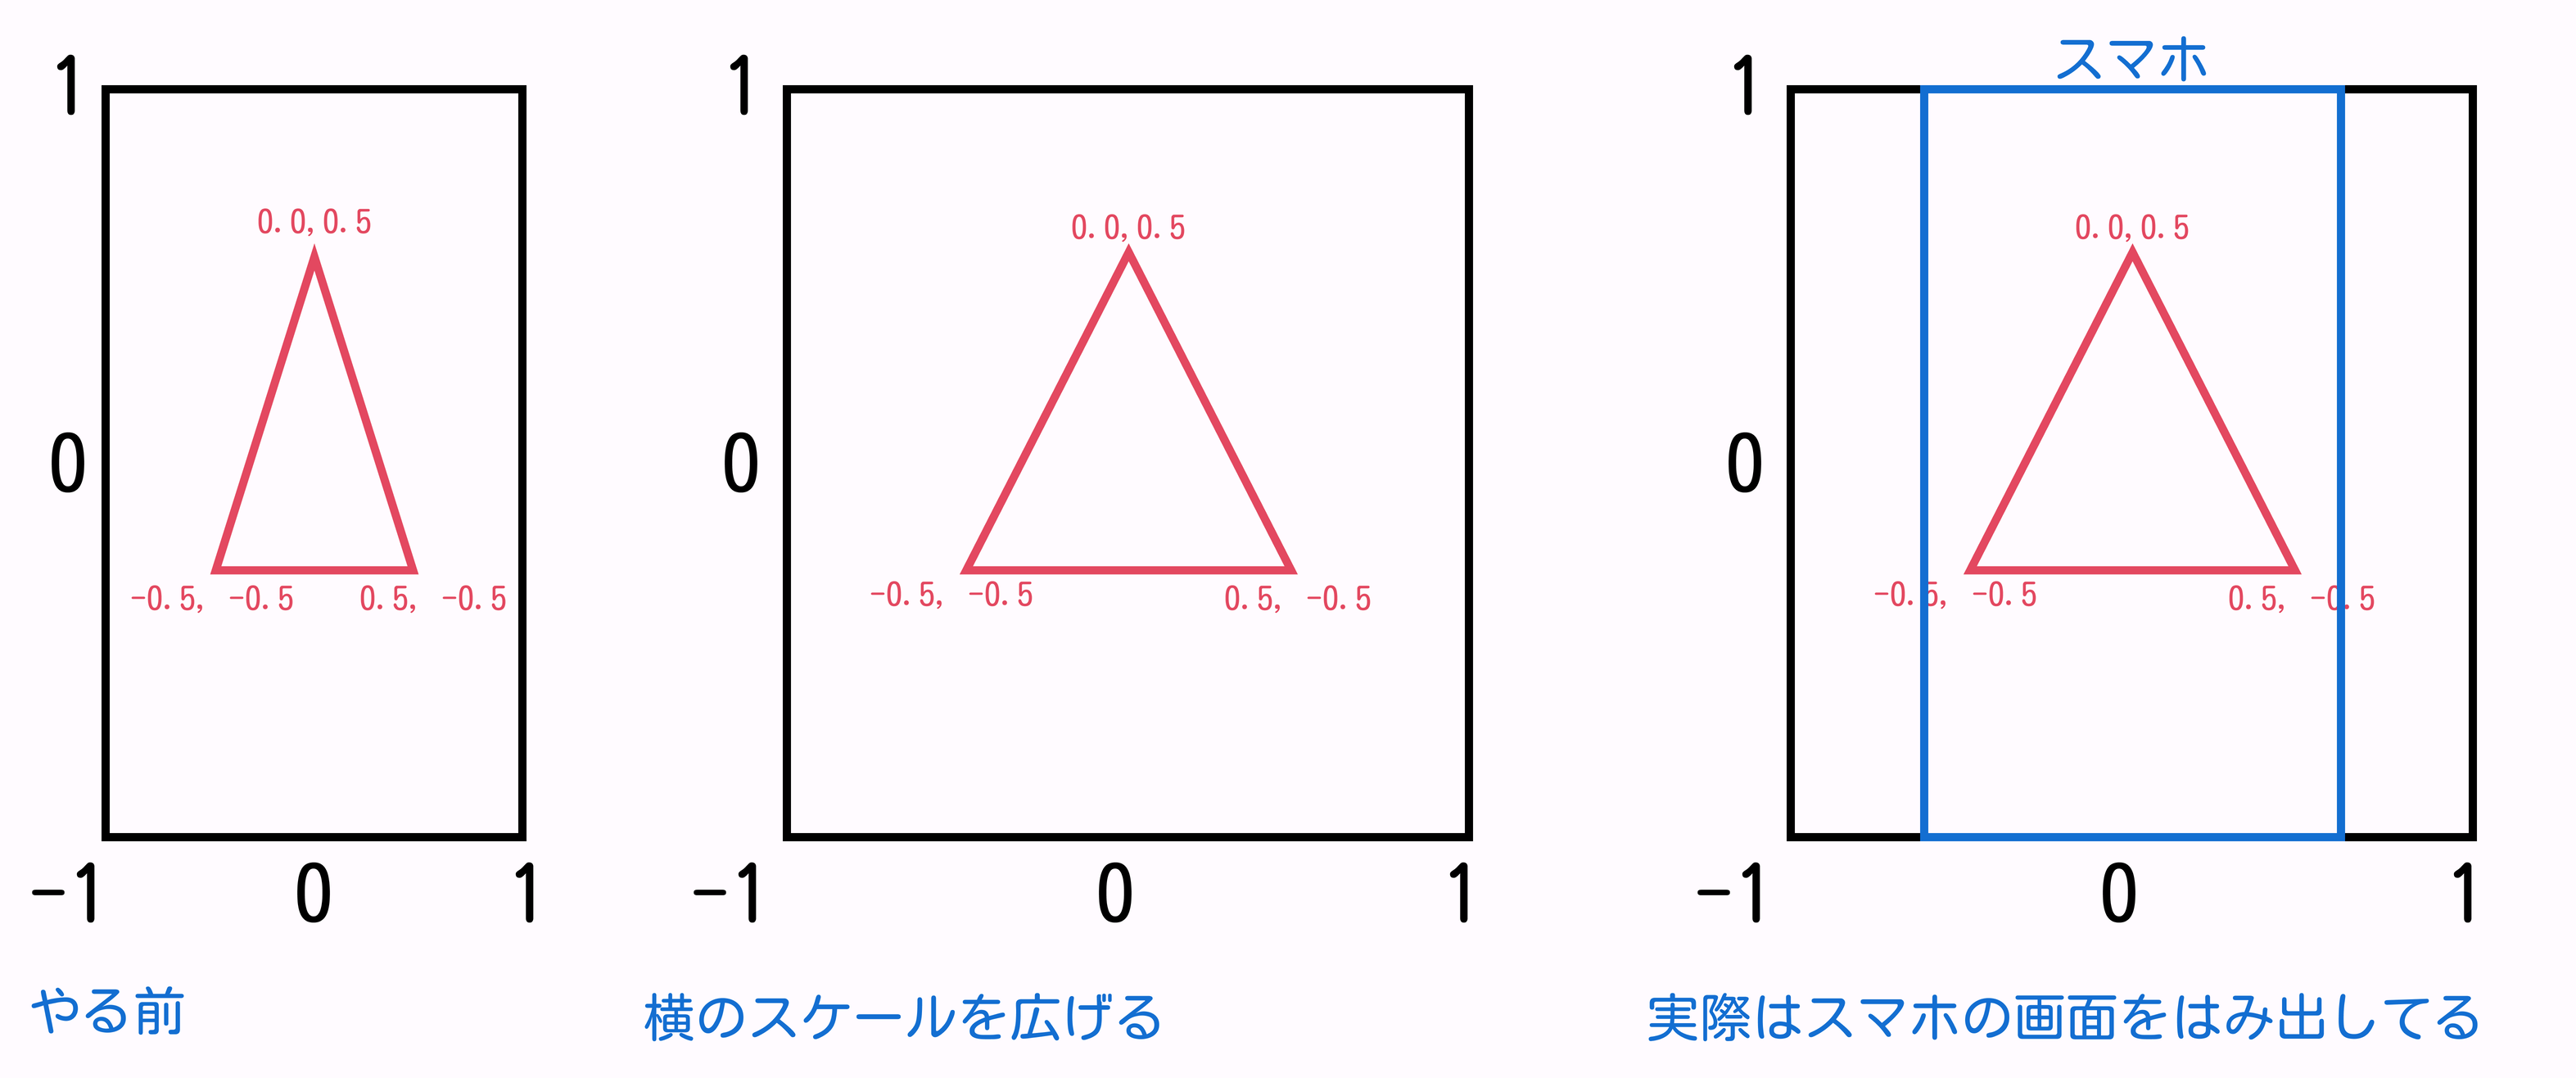
}どういうことをやっているのかというと、縦と横で長さが違うのに-1 ~ 1に収められているのが悪い。なので、縦に長い分だけ横に引き延ばすスケールを適用する行列?を作っています。
縦と同じ長さになるように横を引き延ばします。縦と横の長さが同じになれば三角形も正三角形になるハズです!
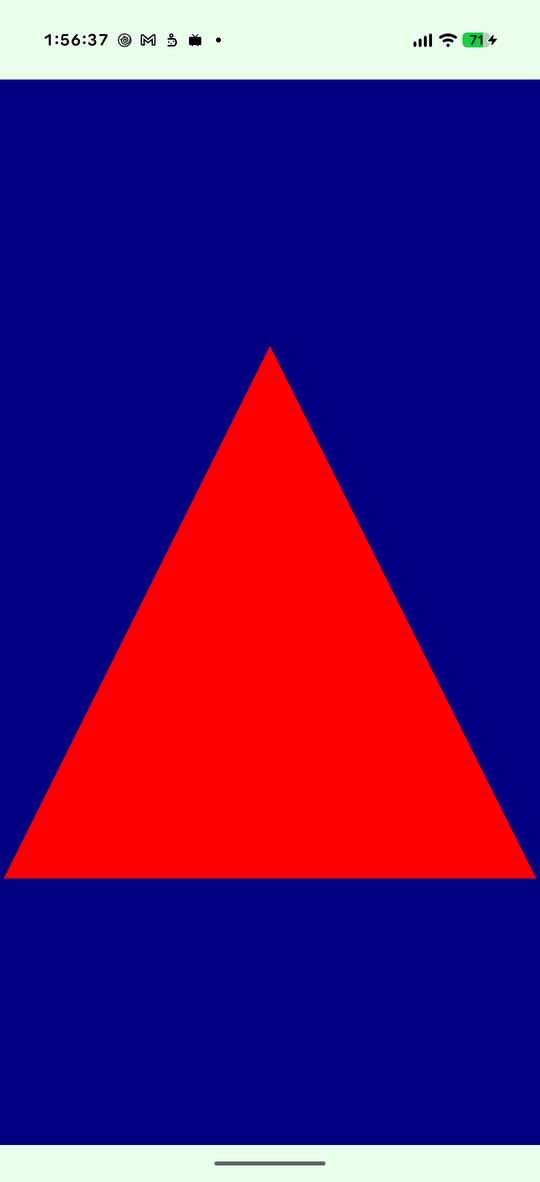
これで実行してみますと、CPUで作った変換行列が適用されて、歪みのないきれいな三角形になっているのではないでしょうか!?
おめでとう!そして低レイヤーグラフィックス APIは難しい。。。
Matrixクラスに回転を変換行列へ追加できる関数があるのでこれを呼べば回転もできます。
変換行列の注意点としては、適用する順番がちゃんとあって、順番を間違えると期待通りになりません。
private var rotate = 0f

fun render() {
    if (!::webGpu.isInitialized) {
        return
    }

    val gpu = webGpu


    // 変換行列を用意
    // 三角形が歪まないようにする
    val transformMatrix = FloatArray(16)
    Matrix.setIdentityM(transformMatrix, 0)
    // 回転
    rotate++
    if (rotate == 360f) {
        rotate = 0f
    }
    Matrix.rotateM(transformMatrix, 0, rotate, 0f, 0f, 1f)
    // WebGPU 側を正方形にする、SurfaceView は画面いっぱいなので縦長のママだが、見切れる前提で正方形にする。これで三角形が歪まなくなる
    if (width < height) {
        val scale = (height / width.toFloat())
        Matrix.scaleM(transformMatrix, 0, scale, 1f, 1f)
    } else {
        val scale = (width / height.toFloat())
        Matrix.scaleM(transformMatrix, 0, 1f, scale, 1f)
    }
    // 小さくする
    Matrix.scaleM(transformMatrix, 0, .5f, .5f, .5f)
    // GPU に転送
    gpu.device.queue.writeBuffer(transformMatrixUniformBuffer, 0, transformMatrix.toByteBuffer())

// 以下省略...あとはrender()を繰り返し呼ぶようにすればrotateがインクリメントされ続けるのでくるくる回るようになります。
LaunchedEffect(key1 = Unit) {
    // サイズと surface が得られること、得られない場合は return している
    combine(
        surfaceSize,
        surfaceFlow,
        ::Pair
    ).collectLatest { (size, surface) ->
        if (size != null && surface != null) {
            val renderer = WebGpuRenderer()
            try {
                renderer.init(surface, size.width, size.height)
                // 繰り返し呼ぶ
                while (true) {
                    delay(16.milliseconds) // 60fps
                    renderer.render()
                }
            } finally {
                // surface が再生成された、破棄されたとき
                renderer.cleanup()
            }
        }
    }
}
以上!入門!これからは本題の万華鏡をつくるぞ!
class MainActivity : ComponentActivity() {
    override fun onCreate(savedInstanceState: Bundle?) {
        super.onCreate(savedInstanceState)
        enableEdgeToEdge()
        setContent {
            AndroidWebGpuMangekyouTheme {
                Scaffold(modifier = Modifier.fillMaxSize()) { innerPadding ->
                    WebGpuSurfaceView(modifier = Modifier.padding(innerPadding))
                }
            }
        }
    }
}

@Composable
fun WebGpuSurfaceView(modifier: Modifier = Modifier) {
    val surfaceSize = remember { MutableStateFlow<IntSize?>(null) }
    val surfaceFlow = remember { MutableStateFlow<Surface?>(null) }

    LaunchedEffect(key1 = Unit) {
        // サイズと surface が得られること、得られない場合は return している
        combine(
            surfaceSize,
            surfaceFlow,
            ::Pair
        ).collectLatest { (size, surface) ->
            if (size != null && surface != null) {
                val renderer = WebGpuRenderer()
                try {
                    renderer.init(surface, size.width, size.height)
                    // 繰り返し呼ぶ
                    while (true) {
                        delay(16.milliseconds)
                        renderer.render()
                    }
                } finally {
                    // surface が再生成された、破棄されたとき
                    renderer.cleanup()
                }
            }
        }
    }

    AndroidView(
        modifier = modifier.onSizeChanged { surfaceSize.value = it },
        factory = { context ->
            SurfaceView(context).apply {
                holder.addCallback(object : SurfaceHolder.Callback {
                    override fun surfaceChanged(holder: SurfaceHolder, format: Int, width: Int, height: Int) {
                        // do nothing
                    }

                    override fun surfaceCreated(holder: SurfaceHolder) {
                        surfaceFlow.value = holder.surface
                    }

                    override fun surfaceDestroyed(holder: SurfaceHolder) {
                        surfaceFlow.value = null
                    }
                })
            }
        }
    )
}
class WebGpuRenderer {
private lateinit var webGpu: WebGpu
private lateinit var renderPipeline: GPURenderPipeline
// 変換行列を渡す
private lateinit var transformMatrixUniformBuffer: GPUBuffer
private lateinit var bindGroup: GPUBindGroup
private var width = 0
private var height = 0
suspend fun init(surface: Surface, width: Int, height: Int) {
this.width = width
this.height = height
// 1. Create Instance & Device
webGpu = createWebGpu(surface)
val device = webGpu.device
// 2. Setup Pipeline (compile shaders)
initPipeline(device)
// 3. Configure the Surface
webGpu.webgpuSurface.configure(
GPUSurfaceConfiguration(
device,
width,
height,
TextureFormat.RGBA8Unorm,
)
)
}
private var rotate = 0f
fun render() {
if (!::webGpu.isInitialized) {
return
}
val gpu = webGpu
// 変換行列を用意
// 三角形が歪まないようにする
val transformMatrix = FloatArray(16)
Matrix.setIdentityM(transformMatrix, 0)
// 回転
rotate++
if (rotate == 360f) {
rotate = 0f
}
Matrix.rotateM(transformMatrix, 0, rotate, 0f, 0f, 1f)
// WebGPU 側を正方形にする、SurfaceView は画面いっぱいなので縦長のママだが、見切れる前提で正方形にする。これで三角形が歪まなくなる
if (width < height) {
val scale = (height / width.toFloat())
Matrix.scaleM(transformMatrix, 0, scale, 1f, 1f)
} else {
val scale = (width / height.toFloat())
Matrix.scaleM(transformMatrix, 0, 1f, scale, 1f)
}
// 小さくする
Matrix.scaleM(transformMatrix, 0, .5f, .5f, .5f)
// GPU に転送
gpu.device.queue.writeBuffer(transformMatrixUniformBuffer, 0, transformMatrix.toByteBuffer())
// 1. Get the next available texture from the screen
val surfaceTexture = gpu.webgpuSurface.getCurrentTexture()
// 2. Create a command encoder
val commandEncoder = gpu.device.createCommandEncoder()
// 3. Begin a render pass (clearing the screen to blue)
val renderPass = commandEncoder.beginRenderPass(
GPURenderPassDescriptor(
colorAttachments = arrayOf(
GPURenderPassColorAttachment(
GPUColor(0.0, 0.0, 0.5, 1.0),
surfaceTexture.texture.createView(),
loadOp = LoadOp.Clear,
storeOp = StoreOp.Store,
)
)
)
)
// 4. Draw
renderPass.setPipeline(renderPipeline)
renderPass.setBindGroup(0, bindGroup) // @group(0) なので 0
renderPass.draw(3) // 三角形の頂点の数が3個
renderPass.end()
// 5. Submit and Present
gpu.device.queue.submit(arrayOf(commandEncoder.finish()))
gpu.webgpuSurface.present()
}
fun cleanup() {
if (::webGpu.isInitialized) {
webGpu.close()
}
}
private fun FloatArray.toByteBuffer(): ByteBuffer {
val bufferSize = this.size * Float.SIZE_BYTES
val byteBuffer = ByteBuffer.allocateDirect(bufferSize)
.order(ByteOrder.nativeOrder())
.also { byteBuffer -> byteBuffer.asFloatBuffer().put(this).rewind() }
return byteBuffer
}
private fun initPipeline(device: GPUDevice) {
val shaderCode = """
// Uniforms 構造体
struct Uniforms {
matrix: mat4x4<f32>,
}
// CPU から受け取る
@group(0) @binding(0) var<uniform> transformMatrix: Uniforms;
@vertex fn vs_main(@builtin(vertex_index) vertexIndex : u32) -> @builtin(position) vec4f {
const pos = array(vec2f(0.0, 0.5), vec2f(-0.5, -0.5), vec2f(0.5, -0.5));
let transformedVec = vec4f(pos[vertexIndex], 0, 1) * transformMatrix.matrix; // 変換行列を適用
return transformedVec;
}
@fragment fn fs_main() -> @location(0) vec4f {
return vec4f(1, 0, 0, 1);
}
"""
// Create Shader Module
val shaderModule = device.createShaderModule(
GPUShaderModuleDescriptor(shaderSourceWGSL = GPUShaderSourceWGSL(shaderCode))
)
// Create Render Pipeline
renderPipeline = device.createRenderPipeline(
descriptor = GPURenderPipelineDescriptor(
vertex = GPUVertexState(
shaderModule,
),
fragment = GPUFragmentState(
shaderModule,
targets = arrayOf(GPUColorTargetState(TextureFormat.RGBA8Unorm))
),
primitive = GPUPrimitiveState(PrimitiveTopology.TriangleList)
)
)
// CPU から値を渡す準備
transformMatrixUniformBuffer = device.createBuffer(
GPUBufferDescriptor(
size = 64,
usage = BufferUsage.Uniform or BufferUsage.CopyDst
)
)
bindGroup = webGpu.device.createBindGroup(
descriptor = GPUBindGroupDescriptor(
layout = renderPipeline.getBindGroupLayout(0),
entries = arrayOf(
GPUBindGroupEntry(binding = 0, buffer = transformMatrixUniformBuffer)
)
)
)
}
}流れとしてはこれに、カメラを用意していい感じにGPUに転送して、三角形を増やして描画する感じになります。
さっきのWebGpuRendererとは別物のクラスを作る予定で、また、カメラの権限を許可してもらう必要があり、別のComposable関数を作ってMainActivityに設置することにします。MangekyouWebGpuRendererはこれから作ります。
class MainActivity : ComponentActivity() {
    override fun onCreate(savedInstanceState: Bundle?) {
        super.onCreate(savedInstanceState)
        enableEdgeToEdge()
        setContent {
            AndroidWebGpuMangekyouTheme {
                Scaffold(modifier = Modifier.fillMaxSize()) { innerPadding ->
                    MangekyouGpuSurfaceView(modifier = Modifier.padding(innerPadding))
                }
            }
        }
    }
}

@Composable
fun MangekyouGpuSurfaceView(modifier: Modifier = Modifier) {
    val surfaceSize = remember { MutableStateFlow<IntSize?>(null) }
    val surfaceFlow = remember { MutableStateFlow<Surface?>(null) }

    val context = LocalContext.current
    val isPermissionGranted = remember { Channel<Boolean>() }
    val permissionRequester = rememberLauncherForActivityResult(
        contract = ActivityResultContracts.RequestPermission(),
        onResult = { isGranted ->
            isPermissionGranted.trySend(isGranted)
        }
    )

    LaunchedEffect(key1 = Unit) {
        // 権限を要求して待つ
        permissionRequester.launch(android.Manifest.permission.CAMERA)
        if (!isPermissionGranted.receive()) {
            println("権限が付与されませんでした...")
        }

        // サイズと surface が得られること、得られない場合は return している
        combine(
            surfaceSize,
            surfaceFlow,
            ::Pair
        ).collectLatest { (size, surface) ->
            if (size != null && surface != null) {
                val renderer = MangekyouWebGpuRenderer(context)
                try {
                    renderer.init(surface, size.width, size.height)
                    // 繰り返し呼ぶ
                    while (true) {
                        delay(16.milliseconds)
                        renderer.render()
                    }
                } finally {
                    // surface が再生成された、破棄されたとき
                    renderer.cleanup()
                }
            }
        }
    }

    AndroidView(
        modifier = modifier.onSizeChanged { surfaceSize.value = it },
        factory = { context ->
            SurfaceView(context).apply {
                holder.addCallback(object : SurfaceHolder.Callback {
                    override fun surfaceChanged(holder: SurfaceHolder, format: Int, width: Int, height: Int) {
                        // do nothing
                    }

                    override fun surfaceCreated(holder: SurfaceHolder) {
                        surfaceFlow.value = holder.surface
                    }

                    override fun surfaceDestroyed(holder: SurfaceHolder) {
                        surfaceFlow.value = null
                    }
                })
            }
        }
    )
}さっきまで作っていたクラスを基礎にするので、とりあえず新しいクラスを作りますが、中身は同じ。
class MangekyouWebGpuRenderer {
    private lateinit var webGpu: WebGpu
    private lateinit var renderPipeline: GPURenderPipeline

    // 変換行列を渡す
    private lateinit var transformMatrixUniformBuffer: GPUBuffer
    private lateinit var bindGroup: GPUBindGroup

    private var width = 0
    private var height = 0

    suspend fun init(surface: Surface, width: Int, height: Int) {
        this.width = width
        this.height = height

        // 1. Create Instance & Device
        webGpu = createWebGpu(surface)
        val device = webGpu.device

        // 2. Setup Pipeline (compile shaders)
        initPipeline(device)

        // 3. Configure the Surface
        webGpu.webgpuSurface.configure(
            GPUSurfaceConfiguration(
                device,
                width,
                height,
                TextureFormat.RGBA8Unorm,
            )
        )
    }

    fun render() {
        if (!::webGpu.isInitialized) {
            return
        }

        val gpu = webGpu


        // 変換行列を用意
        // 三角形が歪まないようにする
        val transformMatrix = FloatArray(16)
        Matrix.setIdentityM(transformMatrix, 0)
        // WebGPU 側を正方形にする、SurfaceView は画面いっぱいなので縦長のママだが、見切れる前提で正方形にする。これで三角形が歪まなくなる
        if (width < height) {
            val scale = (height / width.toFloat())
            Matrix.scaleM(transformMatrix, 0, scale, 1f, 1f)
        } else {
            val scale = (width / height.toFloat())
            Matrix.scaleM(transformMatrix, 0, 1f, scale, 1f)
        }
        // 小さくする
        Matrix.scaleM(transformMatrix, 0, .5f, .5f, .5f)
        // GPU に転送
        gpu.device.queue.writeBuffer(transformMatrixUniformBuffer, 0, transformMatrix.toByteBuffer())


        // 1. Get the next available texture from the screen
        val surfaceTexture = gpu.webgpuSurface.getCurrentTexture()

        // 2. Create a command encoder
        val commandEncoder = gpu.device.createCommandEncoder()

        // 3. Begin a render pass (clearing the screen to blue)
        val renderPass = commandEncoder.beginRenderPass(
            GPURenderPassDescriptor(
                colorAttachments = arrayOf(
                    GPURenderPassColorAttachment(
                        GPUColor(0.0, 0.0, 0.5, 1.0),
                        surfaceTexture.texture.createView(),
                        loadOp = LoadOp.Clear,
                        storeOp = StoreOp.Store,
                    )
                )
            )
        )

        // 4. Draw
        renderPass.setPipeline(renderPipeline)
        renderPass.setBindGroup(0, bindGroup) // @group(0) なので 0
        renderPass.draw(3) // 三角形の頂点の数が3個
        renderPass.end()

        // 5. Submit and Present
        gpu.device.queue.submit(arrayOf(commandEncoder.finish()))
        gpu.webgpuSurface.present()
    }

    fun cleanup() {
        if (::webGpu.isInitialized) {
            webGpu.close()
        }
    }

    private fun FloatArray.toByteBuffer(): ByteBuffer {
        val bufferSize = this.size * Float.SIZE_BYTES
        val byteBuffer = ByteBuffer.allocateDirect(bufferSize)
            .order(ByteOrder.nativeOrder())
            .also { byteBuffer -> byteBuffer.asFloatBuffer().put(this).rewind() }
        return byteBuffer
    }

    private fun initPipeline(device: GPUDevice) {
        val shaderCode = """
    // Uniforms 構造体
    struct Uniforms {
        matrix: mat4x4<f32>,
    }

    // CPU から受け取る
    @group(0) @binding(0) var<uniform> transformMatrix: Uniforms;

    @vertex fn vs_main(@builtin(vertex_index) vertexIndex : u32) -> @builtin(position) vec4f {
        const pos = array(vec2f(0.0, 0.5), vec2f(-0.5, -0.5), vec2f(0.5, -0.5));
        let transformedVec = vec4f(pos[vertexIndex], 0, 1) * transformMatrix.matrix; // 変換行列を適用
        return transformedVec;
    }

    @fragment fn fs_main() -> @location(0) vec4f {
        return vec4f(1, 0, 0, 1);
    }
"""

        // Create Shader Module
        val shaderModule = device.createShaderModule(
            GPUShaderModuleDescriptor(shaderSourceWGSL = GPUShaderSourceWGSL(shaderCode))
        )

        // Create Render Pipeline
        renderPipeline = device.createRenderPipeline(
            descriptor = GPURenderPipelineDescriptor(
                vertex = GPUVertexState(
                    shaderModule,
                ),
                fragment = GPUFragmentState(
                    shaderModule,
                    targets = arrayOf(GPUColorTargetState(TextureFormat.RGBA8Unorm))
                ),
                primitive = GPUPrimitiveState(PrimitiveTopology.TriangleList)
            )
        )

        // CPU から値を渡す準備
        transformMatrixUniformBuffer = device.createBuffer(
            GPUBufferDescriptor(
                size = 64,
                usage = BufferUsage.Uniform or BufferUsage.CopyDst
            )
        )
        bindGroup = webGpu.device.createBindGroup(
            descriptor = GPUBindGroupDescriptor(
                layout = renderPipeline.getBindGroupLayout(0),
                entries = arrayOf(
                    GPUBindGroupEntry(binding = 0, buffer = transformMatrixUniformBuffer)
                )
            )
        )
    }
}AndroidManifest.xmlにカメラ権限を追加します。
<uses-permission android:name="android.permission.CAMERA" />つぎに、MangekyouWebGpuRendererにCamera2用の関数とかを用意します。中身は後で!
また、Camera2APIのためにContextが必要だったのでコンストラクタ引数でとることにします。width と heightもこうやって取ればよかった、、
あとcleanup()に破棄する処理を足しておきました、あと映像サイズをcompanionに置いておきます、CAMERA_WIDTH
class MangekyouWebGpuRenderer(private val context: Context) {

    // 省略...

    // カメラの映像を得る
    private val latestImageChannel = Channel<Image>(capacity = Channel.CONFLATED, onUndeliveredElement = { it.close() })
    private var imageReader: ImageReader? = null
    private var cameraDevice: CameraDevice? = null
    private val cameraExecutor = Executors.newSingleThreadExecutor()

    // 省略...

    fun cleanup() {
        if (::webGpu.isInitialized) {
            webGpu.close()
        }
        cameraDevice?.close()
        imageReader?.close()
    }

    // 省略...

    private suspend fun initCamera2Api() {
        // TODO これから
    }

    companion object {
        private const val CAMERA_WIDTH = 1280
        private const val CAMERA_HEIGHT = 720
    }
}今回はCamera2APIをそのまま使います、CameraXは使ったことが無くて、、Camera2APIのお作法的なコードが続きます。カメラ映像はKotlin CoroutinesのChannelを使ってWebGPUの描画処理であるrender()関数へ渡そうと思うので、ここでは受け取ってtrySend()しています。
ImageReaderですが、今回はYUV_420_888を使っています。Camera2APIを使ったことがあればこれは難しい選択をしたと思うでしょう。だってYUVからBitmap、つまりRGBの配列にするのはけっこー面倒くさい。
JPEGの方が楽です。何も考えずにImageReaderから出てきたバイト配列がすでにJPEGなので、BitmapにしてWebGPUのテクスチャにすれば、フラグメントシェーダーで利用可能なのですから。
なのですが、JPEGはとにかく遅いです。全然速度が出ません。なので難しいYUVの方を使っています。こちらは難しい代わりに結構速度が出ています。
まあそもそもの話、OpenGL ESではSurfaceTextureクラスを使うことで、カメラ映像や動画の映像をOpenGL ESのテクスチャとして使うことが出来ます。VulkanにもHardwareBufferクラスがあり、ImageReaderから出てきたImageのHardwareBufferをそのまま、Vulkanのテクスチャとして使えるそうです。AndroidのWebGPU移植版にはこれに相当するクラスが存在しないっぽいです。なので速度が出るYUVをいい感じにRGBに変換して使うことにします。
@SuppressLint("MissingPermission") // 権限チェックするべきです
private suspend fun initCamera2Api() {
    // 出力先の ImageReader、カメラ映像は Channel で別の関数へおくる
    imageReader = ImageReader.newInstance(CAMERA_WIDTH, CAMERA_HEIGHT, ImageFormat.YUV_420_888, 2)
    imageReader?.setOnImageAvailableListener(
        { imageReader ->
            latestImageChannel.trySend(element = imageReader?.acquireLatestImage() ?: return@setOnImageAvailableListener)
        },
        null
    )

    // Camera2API
    val cameraManager = context.getSystemService(Context.CAMERA_SERVICE) as CameraManager
    val (frontCameraId, _) = cameraManager
        .cameraIdList
        .map { cameraId -> cameraId to cameraManager.getCameraCharacteristics(cameraId) }
        .firstOrNull { (_, characteristic) -> characteristic.get(CameraCharacteristics.LENS_FACING) == CameraCharacteristics.LENS_FACING_BACK } ?: return

    cameraDevice = suspendCancellableCoroutine { cont ->
        cameraManager.openCamera(frontCameraId, object : CameraDevice.StateCallback() {
            override fun onOpened(device: CameraDevice) {
                cont.resume(device)
            }

            override fun onDisconnected(device: CameraDevice) {
                cont.resume(null)
            }

            override fun onError(device: CameraDevice, error: Int) {
                cont.resume(null)
            }
        }, null)
    }

    cameraDevice ?: return
    val captureRequest = cameraDevice!!.createCaptureRequest(CameraDevice.TEMPLATE_PREVIEW).apply {
        addTarget(imageReader!!.surface)
    }
    val captureSession = suspendCancellableCoroutine { continuation ->
        // OutputConfiguration を作る
        val outputConfigurationList = listOf(OutputConfiguration(imageReader!!.surface))
        val sessionConfiguration = SessionConfiguration(SessionConfiguration.SESSION_REGULAR, outputConfigurationList, cameraExecutor, object : CameraCaptureSession.StateCallback() {
            override fun onConfigured(captureSession: CameraCaptureSession) {
                continuation.resume(captureSession)
            }

            override fun onConfigureFailed(p0: CameraCaptureSession) {
                continuation.resume(null)
            }
        })
        cameraDevice!!.createCaptureSession(sessionConfiguration)
    }

    captureSession ?: return
    captureSession.setRepeatingRequest(captureRequest.build(), null, null)
}さっきの入門ではバーテックスシェーダー内に三角形の頂点の座標を書いていましたが、本当はCPU側から送ってあげるのが良いはずです。
先述の通り、三角形が組み合わさってできているので、いい感じに三角形を並べていけばよさそうですね!
とりあえず六個の三角形を描画しようと思います。全然万華鏡って感じはしないと思いますが。とにかく動くところまで!
companion object {
    private const val CAMERA_WIDTH = 1280
    private const val CAMERA_HEIGHT = 720

    private val VERTEX_ARRAY = floatArrayOf(
        // 下 真ん中
        0.0f, 0.0f,
        -0.5f, -1.0f,
        0.5f, -1.0f,

        // 下 右
        0.0f, 0.0f,
        0.5f, -1.0f,
        1.0f, 0.0f,

        // 下 左
        0.0f, 0.0f,
        -1.0f, 0.0f,
        -0.5f, -1.0f,

        // 上 真ん中
        0.0f, 0.0f,
        -0.5f, 1.0f,
        0.5f, 1.0f,

        // 上 右
        0.0f, 0.0f,
        0.5f, 1.0f,
        1.0f, 0.0f,

        // 上 左
        0.0f, 0.0f,
        -0.5f, 1.0f,
        -1.0f, 0.0f,
    )
}vertexBufferをlateinit varに追加します。
private lateinit var webGpu: WebGpu
private lateinit var renderPipeline: GPURenderPipeline
private lateinit var vertexBuffer: GPUBuffer // これ次にinitPipeline()関数で、createRenderPipeline()を呼び出している箇所より前で、頂点バッファーを作ります。
作ってもうすぐにwriteBufferで送ってしまいましょう。
// 頂点
vertexBuffer = device.createBuffer(
    descriptor = GPUBufferDescriptor(
        size = (VERTEX_ARRAY.size * Float.SIZE_BYTES).toLong(),
        usage = BufferUsage.Vertex or BufferUsage.CopyDst
    )
)
device.queue.writeBuffer(vertexBuffer, 0, VERTEX_ARRAY.toByteBuffer())

// Create Render Pipeline
// 以下省略...次にすぐ下のcreateRenderPipeline()を書き足します。GPUVertexState()のbuffersの部分ですね。arrayStrideですが、後述しますが構造体が登場するのですが、今回はこの構造体にX,Yという感じでvec2fしか使ってないんですね。つーわけでFloatが二つ。
つぎのshaderLocationも構造体のところで出るのですが、今回はこの構造体に先述のx,yしか入れないためlocationは0になります。
renderPipeline = device.createRenderPipeline(
    descriptor = GPURenderPipelineDescriptor(
        vertex = GPUVertexState(
            shaderModule,
            // 頂点を
            buffers = arrayOf(
                GPUVertexBufferLayout(
                    arrayStride = (2 * Float.SIZE_BYTES).toLong(), // 頂点(x,y)しか渡してないため 2 * FloatSize
                    attributes = arrayOf(
                        // 今回は vertex の構造体に vec2f で足りる x,y しか入れていないため
                        GPUVertexAttribute(
                            shaderLocation = 0,
                            offset = 0,
                            format = VertexFormat.Float32x2
                        )
                    )
                )
            )
        ),
        fragment = GPUFragmentState(
            shaderModule,
            targets = arrayOf(GPUColorTargetState(TextureFormat.RGBA8Unorm))
        ),
        primitive = GPUPrimitiveState(PrimitiveTopology.TriangleList),
    )
)最後、render()でもsetVertexBuffer()を呼ぶ必要と、draw()の頂点の数がずれているので直しましょう!
// 4. Draw
renderPass.setPipeline(renderPipeline)
renderPass.setVertexBuffer(0, vertexBuffer)
renderPass.setBindGroup(0, bindGroup) // @group(0) なので 0
renderPass.draw(VERTEX_ARRAY.size / 2) // 三角形の頂点の数、x,y,x,y... の並びをした Float 配列なので、サイズを取って半分にすればよい
renderPass.end()全部貼ります、どーん
頂点を渡すためにstruct Vertex { }構造体を作りました。もしかしたら引数に直接@location(0) ..と書いてもよかったかもしれません。shaderLocationで指定した通り0番目にx,yが入ってくるようになります。
vs_mainではこの構造体を受け取るようにします。すると、draw()の呼び出し回数を数えてくれていた@builtin(vertex_index) vertexIndex : u32が消えます。
その代わりにKotlinで書いてたVERTEX_ARRAYから対応する回数の座標のx,yを直接貰えるようになります。
        val shaderCode = """
    // Uniforms 構造体
    struct Uniforms {
        matrix: mat4x4<f32>,
    }

    // CPU から頂点を受け取る
    struct Vertex {
        @location(0) position: vec2f,
    }

    // CPU から受け取る
    @group(0) @binding(0) var<uniform> transformMatrix: Uniforms;

    @vertex fn vs_main(vertex: Vertex) -> @builtin(position) vec4f {
        let transformedVec = vec4f(vertex.position, 0, 1) * transformMatrix.matrix; // 変換行列を適用
        return transformedVec;
    }

    @fragment fn fs_main() -> @location(0) vec4f {
        return vec4f(1, 0, 0, 1);
    }
"""できたぜ!次はカメラですね
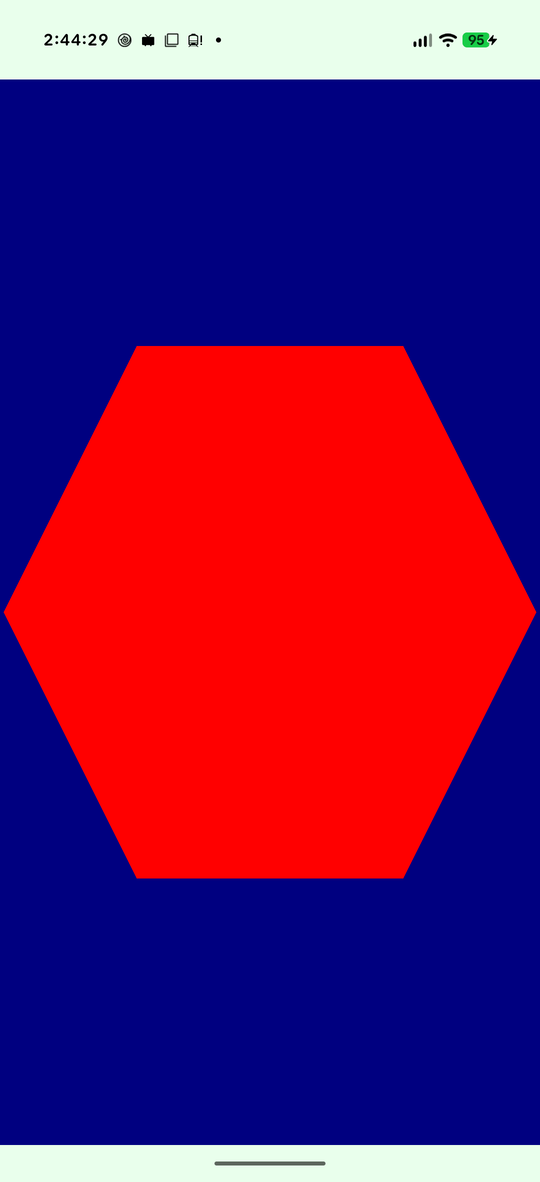
Camera2APIでもらった映像データはImageReaderによってYUVとか言うのになります。
これはRGBではありません。プレーンというのはまあその色が入っているバイト配列です。
YプレーンとUプレーンとVプレーンで色が分かれていて、それぞれ画像としても表示できます。Yプレーンが雑に言うとモノクロ画像で、それに色を付けるのがUプレーンとYプレーンになります。
ただ、これに加えてクロマサンプリングと呼ばれる技術を使い人間にバレないように情報を減らす技術が使われています。
詳しくはこの後話しますが、Yプレーンのモノクロ画像の大きさと、UプレーンとVプレーンの画像の大きさは異なることがあります(データ量を減らすが画質は維持できてる)。というか今回は異なります。
なので、ざっくりYプレーンとUプレーンとVプレーンを使ってYUVからRGBに変換する式を適用すると、RGBになるハズです。
難しいように思えますが、フラグメントシェーダーを使って描画するとそこまで難しく無いです。
(というか、GPUだと座標が0~1に正規化さ、むしろCPUで座標を計算するよりも簡単かもしれません!!)
(また、ベクトル同士の掛け算がシェーダーだと文字通り出来るのも簡単にできる要因かもしれません)
クロマサンプリングの話を、今回これがあるから避けて通れない。YUVの中でも種類があり4:4:4とか4:2:0とかあります。
もしかしたらYプレーンと比べて、UプレーンとVプレーンはバイト配列が半分(半分の画像サイズ)になっているという噂を聞いたかもしれません。
これは、Yプレーン(モノクロ画像)は1ピクセルごとに色を保存します。
一方、UプレーンとVプレーンの色は1ピクセルごとに保存しなくても人間は鈍感だから分からないのでは???2ピクセルの分を同じ色にすれば、Yプレーンの半分のデータ容量で済むし人間にはバレないというわけです。
例えば、横4ピクセル縦2ピクセルの例を出します。
YUV 444の場合は1ピクセルごとにY,U,V保存するのでこうなりますね。
 Y              U               V
+-------------+ +-------------+ +-------------+
| Y1 Y2 Y3 Y4 | | U1 U2 U3 U4 | | V1 V2 V3 V4 |
| Y5 Y6 Y7 Y8 | | U5 U6 U7 U8 | | V5 V6 V7 V8 |
+-------------+ +-------------+ +-------------+
YUV 422の場合はこうです。横2ピクセル分が同じ色になっています。
 Y              U               V
+-------------+ +-------------+ +-------------+
| Y1 Y2 Y3 Y4 | | U1 U1 U2 U2 | | V1 V1 V2 V2 |
| Y5 Y6 Y7 Y8 | | U3 U3 U4 U4 | | V3 V3 V4 V4 |
+-------------+ +-------------+ +-------------+
YUV 420の場合はこうです。横2ピクセルと縦2ピクセル分が同じ色になっています。
 Y              U               V
+-------------+ +-------------+ +-------------+
| Y1 Y2 Y3 Y4 | | U1 U1 U2 U2 | | V1 V1 V2 V2 |
| Y5 Y6 Y7 Y8 | | U1 U1 U2 U2 | | V1 V1 V2 V2 |
+-------------+ +-------------+ +-------------+最後にこれ、Androidの場合はインターリーブされています。ImageReaderクラスからYUVが得られるわけです。YUV 420なのでYプレーンと比べて、UプレーンとVプレーンは4分の1になります。
インターリーブ、今回の文脈での使い道の説明だと、Yプレーンと同じバイト配列のサイズを作って、UプレーンとVプレーンのデータを交互に入れることを指しています。UプレーンとYプレーンを足すとYプレーンのサイズと同じになりますね!。
ハードウェア由来??の理由らしいですが、UプレーンとVプレーンで別々のバイト配列を確保するよりも良いらしいです。
Yプレーン = [Y1,Y2,Y3,Y4 ...]
Uプレーン = [U1,V1,U2,V2 ...]
Vプレーン = [V1,U2,V2 ...]インターリーブされているため、ImageReaderから出てきたYUVのUプレーンもVプレーンも、AndroidOS的には同じバイト配列の参照のはずです。
ただ、Uプレーンの場合は最初にUプレーンのデータから配列が始まるようになっています。同様にVプレーンも。
わかる。まだAndroid版WebGPUは時期尚早。
OpenGL ESの場合はカメラや動画の映像をOpenGL ESのテクスチャとして使えるSurfaceTextureクラスが存在します。
もう本当にカメラや動画プレイヤーの出力先として使って、あとはOpenGL ESのテクスチャのuniformに設定して、、、、みたいな感じ。YUVとかは出てこない。
全部GPUがやってくれてOpenGL ESに映像を転送してくれる。
Vulkanにも同様の機能がある。
Androidに移植されたWebGPUにも同様の効率よく映像をやり取りする仕組みができるまで、手を出さなくてもいいかもね。
つまり我々の課題は二つ、YUVなのでRGBにするシェーダーを書くのと、前提としてインターリーブされているのでYUVに分離するための処理を書かないといけませんね。
まずはインターリーブされたプレーンの場合は元に戻す拡張関数を書きました。Image.PlaneのpixelStrideが1以外の場合はインターリーブされており、pixelStride分indexをインクリメントすると次のデータが得られるという形になります。
private fun Image.Plane.fixIfInterleaveRePutPlane(yPlaneWidth: Int, yPlaneHeight: Int): ByteBuffer {
    // U/V プレーンは Y プレーンの半分のサイズ
    val uvPlaneWidth = yPlaneWidth / 2
    val uvPlaneHeight = yPlaneHeight / 2

    val result = ByteBuffer.allocateDirect(uvPlaneWidth * uvPlaneHeight)

    // pixelStride が
    // 1 の場合は、[ Y1,Y2,Y3,Y4 ] のように、バイト配列に連続してデータが入っている
    // 2 とかの場合、U/V プレーンを別々に取得しても、[ U1,V1,U2,V2 ] のように、一つのバイト配列に二種類のデータが交互に入っている(インターリーブ)
    // 後者の場合はそのままでは WebGPU/OpenGLES のテクスチャとして使うことができないため、それぞれ切り離す必要がある
    // ---
    // また、後者の場合、実際には U/V 両方のデータが入っているため U/V プレーンは Y プレーンの半分。ですらない。
    // それぞれのプレーンにすれば半分のサイズで収まります。
    if (pixelStride == 1) {
        buffer.put(result)
        return result
    }

    // 例として [ U1, V1, U2 V2 Padding, U3, V3, U4, V4 ] の場合
    // pixelStride が 2 になる。次の同じデータが 2 バイト先にあることを表している
    // 二種類のデータとは別に、Padding が含まれていて、Padding 込みの横一列は rowStride で取得可能。基本的に Padding で次の横一列になるハズ
    repeat(uvPlaneHeight) { y ->
        // この行の先頭位置を rowStride から計算
        val rowStartIdx = y * rowStride
        // 2つ先を読む(1byte 飛ばして 1byte 読む)
        for (x in 0 until uvPlaneWidth) {
            val readPosition = rowStartIdx + (x * pixelStride)
            // 一応
            if (readPosition < buffer.capacity()) {
                result.put(buffer[readPosition])
            }
        }
    }
    return result
}コンピューターグラフィックスの世界ではGPUで描画する画像のことをテクスチャと呼ぶらしいです。YUVもそれぞれのプレーンは画像として表すため、テクスチャとしてGPUへ送ります。
というわけでWebGPUにテクスチャを登録しましょう。クラスの変数にテクスチャとsamplerを宣言します。samplerはOpenGL ESだと省略できた?ので目新しいかも。
class MangekyouWebGpuRenderer(private val context: Context) {
    // 省略

    // WebGPU テクスチャ
    private lateinit var sampler: GPUSampler
    private lateinit var textureYuvY: GPUTexture
    private lateinit var textureYuvU: GPUTexture
    private lateinit var textureYuvV: GPUTexture

// 省略次にinitPipeline()でbindGroupを作る前でテクスチャを作ります。OpenGL ESの時のglなんとかかんとか()と比べると本当に分かりやすい!!!1!
ところで今回、BitmapのようなRGBのバイト配列を渡すわけではなく、YUVはそれぞれの画像を見ると単色しか使ってないんですよね。
なのでformatはrだけを使うものにしました。rgbの画像であればrだけじゃもちろんダメです!
作れたらGPUBindGroupDescriptor()で登録しましょう。bindingの数字は後でシェーダーを書くときに使うので覚えておいてください!
(覚えなくてもカンニングしてよいのでいいです)
private fun initPipeline(device: GPUDevice) {
    // 省略...

    // テクスチャ。よく考えると YUV それぞれは単色である、なので RGB も確保せずとも R だけで足りる
    // U/V プレーンは半分
    val textureUvWidth = CAMERA_WIDTH / 2
    val textureUvHeight = CAMERA_HEIGHT / 2
    sampler = webGpu.device.createSampler()
    textureYuvY = webGpu.device.createTexture(
        descriptor = GPUTextureDescriptor(
            usage = TextureUsage.TextureBinding or TextureUsage.CopyDst,
            size = GPUExtent3D(CAMERA_WIDTH, CAMERA_HEIGHT),
            format = TextureFormat.R8Unorm
        )
    )
    textureYuvU = webGpu.device.createTexture(
        descriptor = GPUTextureDescriptor(
            usage = TextureUsage.TextureBinding or TextureUsage.CopyDst,
            size = GPUExtent3D(textureUvWidth, textureUvHeight),
            format = TextureFormat.R8Unorm
        )
    )
    textureYuvV = webGpu.device.createTexture(
        descriptor = GPUTextureDescriptor(
            usage = TextureUsage.TextureBinding or TextureUsage.CopyDst,
            size = GPUExtent3D(textureUvWidth, textureUvHeight),
            format = TextureFormat.R8Unorm
        )
    )

    bindGroup = webGpu.device.createBindGroup(
        descriptor = GPUBindGroupDescriptor(
            layout = renderPipeline.getBindGroupLayout(0),
            entries = arrayOf(
                // 変換行列
                GPUBindGroupEntry(binding = 0, buffer = transformMatrixUniformBuffer),
                // テクスチャ
                GPUBindGroupEntry(binding = 1, sampler = sampler),
                GPUBindGroupEntry(binding = 2, textureView = textureYuvY.createView()),
                GPUBindGroupEntry(binding = 3, textureView = textureYuvU.createView()),
                GPUBindGroupEntry(binding = 4, textureView = textureYuvV.createView())
            )
        )
    )
}まずはWikiにあるYUVをRGBにする公式を見てください。分かんないですよね!
なんかよく分からないデカい波かっこがある、が、先述の通りよく分からくてもこの手のフラグメントシェーダーは息を吸うのと同じようにベクトル同士の掛け算ができるので問題ないです。
この中で使うのはBT.709です(Rec.709)。HDRではないカメラ映像の場合は十中八九BT.709です(SDRですね)。BT.709というのは色空間と呼ばれ、使える色の範囲の事です。HDR動画だとBT.2020が使われより鮮やかで眩しいですが、これはBT.709よりも使える色が多いからですね。
色空間とかガンマカーブとかはAndroid で HDR 動画を扱う記事で触れたのでそっちで・・・
Android で HDR 動画の撮影、動画編集アプリを作る - たくさんの自由帳
https://takusan.negitoro.dev/posts/android_hdr_camera_video_editor/
シェーダーでやることは、テクスチャを受け取る、テクスチャを描画できるようにバーテックスシェーダーからテクスチャ座標?を返す、YUVからRGBの変換式をフラグメントシェーダーで書く。
まず簡単なのは@group(0) @binding(2) var textureYuvY: texture_2d<f32>;ですかね。YUVで三つ分のテクスチャと(bindingの番号気を付けて!)、samplerを受け取ります。
次にバーテックスシェーダーから構造体を返せるようにします。@builtin(position) position: vec4fに加えて、テクスチャ座標に変換したもの返します。WebGPUは縦横が-1 から 1の範囲に正規化されると言いましたが、これとは別にテクスチャ座標というのがあって、これは0 から 1になります。
複数の値を返すためにstruct VertexOutput { }構造体を作りました。vs_main()の返り値を-> VertexOutputに直して、returnで構造体を返すようにします。
また、fs_main()の引数をoutput: vertexOutputにしてバーテックスシェーダーの結果を受け取れるようにします。
最後のRGB変換は、Wikiの通りです。mat3x3はよくわかりません。このよく分からない数字の塊とvec3f(Y,U,V)のベクトルを掛け算するとRGBになるらしいです。
    private fun initPipeline(device: GPUDevice) {
        val shaderCode = """
    // Uniforms 構造体
    struct Uniforms {
        matrix: mat4x4<f32>,
    }

    // CPU から頂点を受け取る
    struct Vertex {
        @location(0) position: vec2f,
    }

    // フラグメントシェーダーへ渡す
    struct VertexOutput {
        @builtin(position) position: vec4f,
        @location(0) uv : vec2f,
    }

    // CPU から受け取る
    @group(0) @binding(0) var<uniform> transformMatrix: Uniforms;
    @group(0) @binding(1) var smp: sampler;
    @group(0) @binding(2) var textureYuvY: texture_2d<f32>;
    @group(0) @binding(3) var textureYuvU: texture_2d<f32>;
    @group(0) @binding(4) var textureYuvV: texture_2d<f32>;

    @vertex fn vs_main(vertex: Vertex) -> VertexOutput {
        let transformedVec = vec4f(vertex.position, 0, 1) * transformMatrix.matrix; // 変換行列を適用
        var output: VertexOutput;
        output.position = transformedVec;
        output.uv = transformedVec.xy *  0.5 + 0.5; // テクスチャ座標に変換する
        return output;
    }

    @fragment fn fs_main(output: VertexOutput) -> @location(0) vec4f {

        // 位置に対応する YUV とりだし
        // 以下、R, G, B, Yの値域は[0, 1]。Cb, Crの値域は[-0.5, 0.5]
        let y = (textureSample(textureYuvY, smp, output.uv).r * (255.0 / 235.0) - (16.0 / 235.0));
        let u = (textureSample(textureYuvU, smp, output.uv).r - 0.5);
        let v = (textureSample(textureYuvV, smp, output.uv).r - 0.5);

        // YUV から BT.709 RGB の変換式は Wiki
        // https://ja.wikipedia.org/wiki/YUV#RGBからの変換
        let yuvToRgbBt709 = mat3x3<f32>(
            vec3f(1.0, 1.0, 1.0),
            vec3f(0.0, -0.187324, 1.8556),
            vec3f(1.5748, -0.468124, 0.0)
        );

        let rgb = yuvToRgbBt709 * vec3f(y, u, v);
        return vec4<f32>(rgb, 1.0);
    }
"""

// 以下省略...違う方法
GitHub - wenxiaoming/YUVRender: This project uses GPU to convert YUV to RGB for rendering on Android platform.
This project uses GPU to convert YUV to RGB for rendering on Android platform. - wenxiaoming/YUVRender
https://github.com/wenxiaoming/YUVRender
Wikiに書いてある数字の塊はR, G, B, Yの値域は[0, 1]。Cb, Crの値域は[-0.5, 0.5]の前提のコードです。
一方、先にYUV テクスチャの色を0~1にせずに調整した後にRGBの変換式に入れる方法もあります。16.0 / 255.0のところとかですね。
@fragment fn fs_main(output: VertexOutput) -> @location(0) vec4f {

    let yuvToRgbBt709 = mat3x3<f32>(
        vec3<f32>(1.164, 1.164, 1.164),
        vec3<f32>(0.0, -0.213, 2.112),
        vec3<f32>(1.793, -0.533, 0.0)
    );

    let y = (textureSample(textureYuvY, smp, output.uv).r - (16.0 / 255.0));
    let u = (textureSample(textureYuvU, smp, output.uv).r - (128.0 / 255.0));
    let v = (textureSample(textureYuvV, smp, output.uv).r - (128.0 / 255.0));

    let rgb = yuvToRgbBt709 * vec3<f32>(y, u, v);
    return vec4<f32>(rgb, 1.0);
}最後にImageReaderから貰うYUVをGPUに転送し、あとはWebGPUで描画します。Kotlin CoroutinesでImageReaderのコールバックで貰えるImageをChannelを使って、この関数で受け取ります。
YUVはさっき作った拡張関数でインターリーブを戻して、GPUに渡します!。OpenGL ESの時はべらぼうに引数が多かった気がするのでめっちゃ人間よりだな~って。
render()関数を書き換えます!
suspend fun render() {
    if (!::webGpu.isInitialized) {
        return
    }

    val gpu = webGpu


    // YUV を受け取って GPU に転送する処理
    val image = latestImageChannel.receive()
    val yuvY = image.planes[0].buffer
    val yuvU = image.planes[1].fixIfInterleaveRePutPlane(CAMERA_WIDTH, CAMERA_HEIGHT)
    val yuvV = image.planes[2].fixIfInterleaveRePutPlane(CAMERA_WIDTH, CAMERA_HEIGHT)
    image.close()
    // YUV を GPU に送信
    val yuvUvWidth = CAMERA_WIDTH / 2
    val yuvUvHeight = CAMERA_HEIGHT / 2
    webGpu.device.queue.writeTexture(
        destination = GPUTexelCopyTextureInfo(textureYuvY),
        data = yuvY,
        writeSize = GPUExtent3D(CAMERA_WIDTH, CAMERA_HEIGHT),
        dataLayout = GPUTexelCopyBufferLayout(bytesPerRow = CAMERA_WIDTH) // 1ピクセル1バイトしか使ってない (TextureFormat.R8Unorm)
    )
    webGpu.device.queue.writeTexture(
        destination = GPUTexelCopyTextureInfo(textureYuvU),
        data = yuvU,
        writeSize = GPUExtent3D(yuvUvWidth, yuvUvHeight),
        dataLayout = GPUTexelCopyBufferLayout(bytesPerRow = yuvUvWidth)
    )
    webGpu.device.queue.writeTexture(
        destination = GPUTexelCopyTextureInfo(textureYuvV),
        data = yuvV,
        writeSize = GPUExtent3D(yuvUvWidth, yuvUvHeight),
        dataLayout = GPUTexelCopyBufferLayout(bytesPerRow = yuvUvWidth)
    )


    // 変換行列を用意
    // 三角形が歪まないようにする
    val transformMatrix = FloatArray(16)

// 以下省略...でもなんか違う!!!全然万華鏡じゃない、しかもなんか回転している。
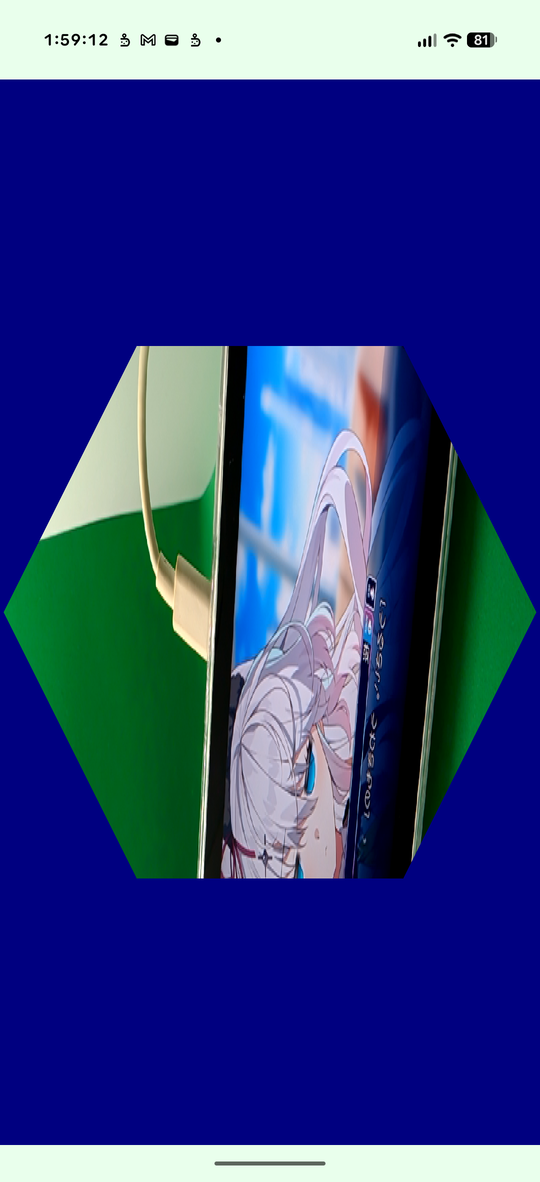
三角形はこのままでよいでしょう。問題はそれぞれの三角形で描画している画像が問題です。
それぞれの三角形で描画されていない問題と、それぞれの三角形で描画する際に回転されていてほしい問題、カメラ映像がなんか回転、反転している問題。
そもそもなんで回転されているのかはわかりません。Camera2 APIのせい????
反転しているのは多分WebGPUのテクスチャ座標の仕様です。テクスチャ座標は-1から1ではなく!0から1になります。
そして反転しているためWebGPUのテクスチャ座標は上方向に0に近づく仕様です。左上がX=0,Y=0になり、右下がX=1,Y=1になります。
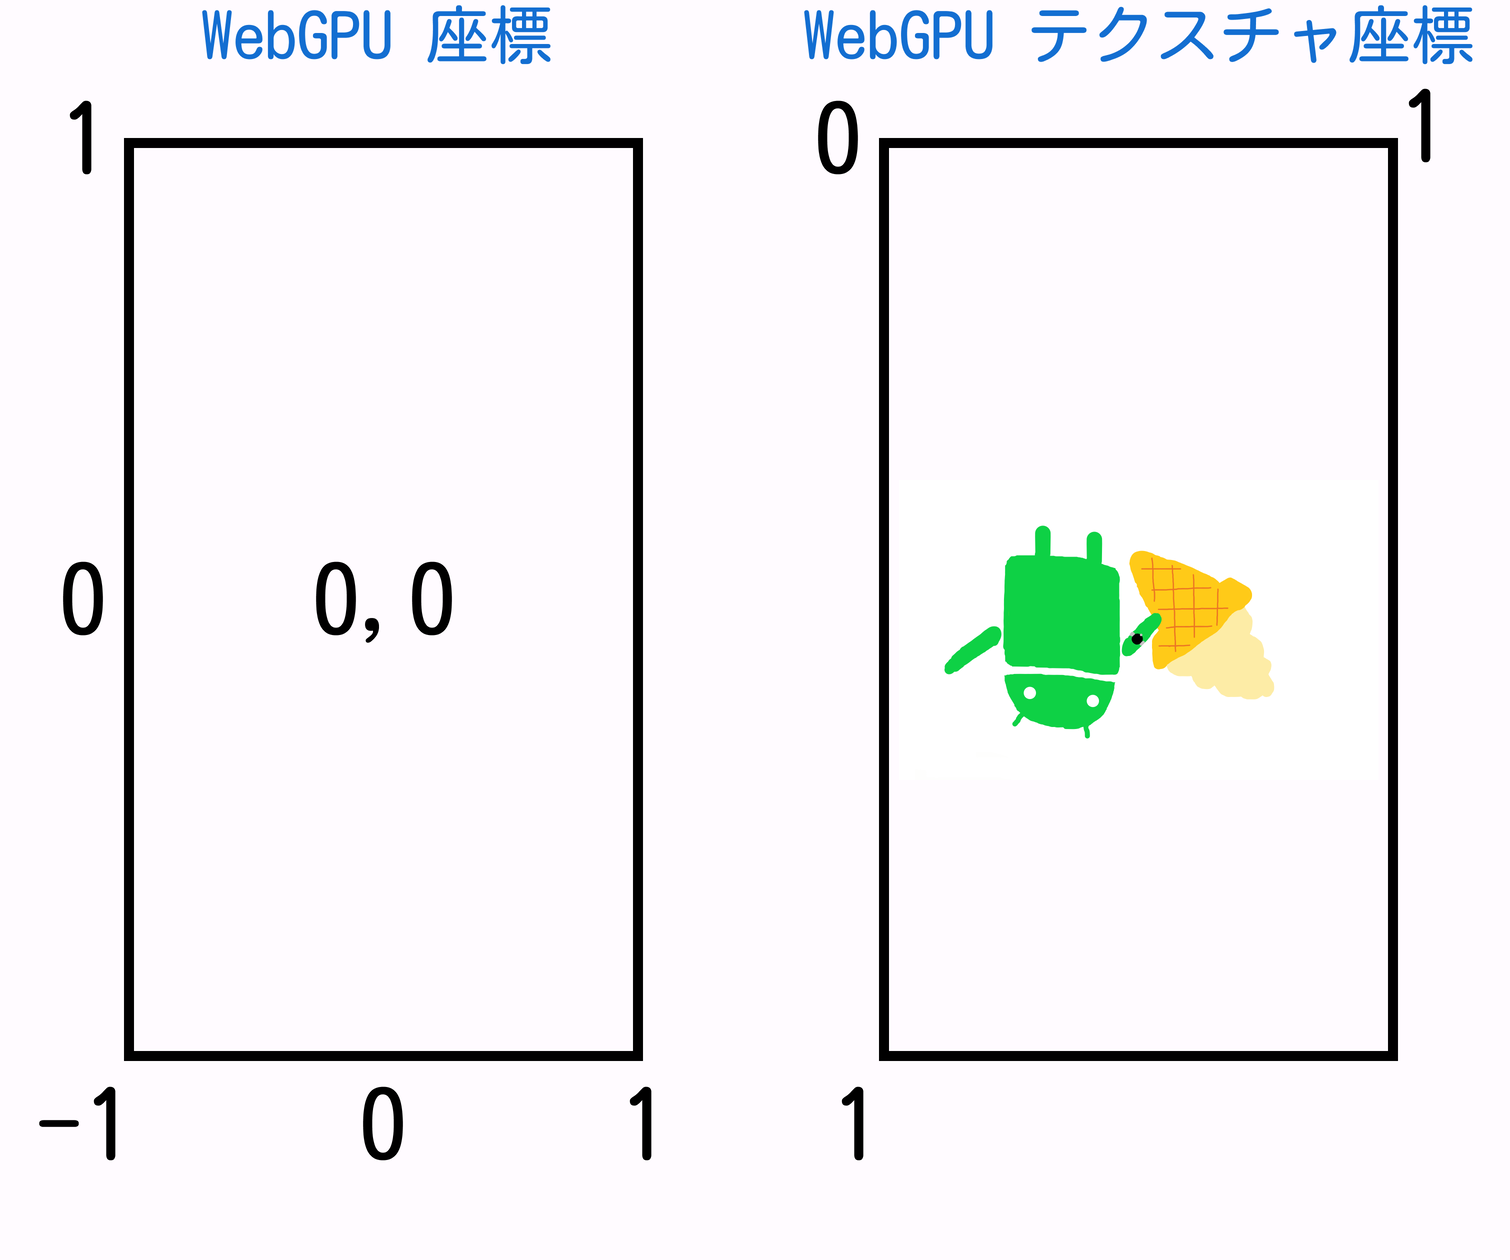
話を戻して、テクスチャ座標に適用する変換行列を用意すればよい気がします!Unfirom構造体にテクスチャ用の変換行列を追加して受け取れるようにします。
まずはUniforms構造体にtextureMatrix: mat4x4<f32>,を追加しました。
また、output.uvに入れる前にlet uv = transformedVec * transformMatrix.textureMatrix;で計算をし、テクスチャ用の変換行列を適用します。三角形の位置はそのまま、テクスチャ(フラグメントシェーダー)にのみ回転とか反転が適用されます!
    private fun initPipeline(device: GPUDevice) {
        val shaderCode = """
    // Uniforms 構造体
    struct Uniforms {
        matrix: mat4x4<f32>,
        textureMatrix: mat4x4<f32>,
    }

    // CPU から頂点を受け取る
    struct Vertex {
        @location(0) position: vec2f,
    }

    // フラグメントシェーダーへ渡す
    struct VertexOutput {
        @builtin(position) position: vec4f,
        @location(0) uv : vec2f,
    }

    // CPU から受け取る
    @group(0) @binding(0) var<uniform> transformMatrix: Uniforms;
    @group(0) @binding(1) var smp: sampler;
    @group(0) @binding(2) var textureYuvY: texture_2d<f32>;
    @group(0) @binding(3) var textureYuvU: texture_2d<f32>;
    @group(0) @binding(4) var textureYuvV: texture_2d<f32>;

    @vertex fn vs_main(vertex: Vertex) -> VertexOutput {
        let transformedVec = vec4f(vertex.position, 0, 1) * transformMatrix.matrix; // 変換行列を適用
        let uv = transformedVec * transformMatrix.textureMatrix;
        var output: VertexOutput;
        output.position = transformedVec;
        output.uv = uv.xy * 0.5 + 0.5; // テクスチャ座標に変換する
        return output;
    }

    @fragment fn fs_main(output: VertexOutput) -> @location(0) vec4f {

        // 位置に対応する YUV とりだし
        // 以下、Yの値域は[0, 1]。Cb, Crの値域は[-0.5, 0.5]
        let y = (textureSample(textureYuvY, smp, output.uv).r * (255.0 / 235.0) - (16.0 / 235.0));
        let u = (textureSample(textureYuvU, smp, output.uv).r - 0.5);
        let v = (textureSample(textureYuvV, smp, output.uv).r - 0.5);

        // YUV から BT.709 RGB の変換式は Wiki
        // https://ja.wikipedia.org/wiki/YUV#RGBからの変換
        let yuvToRgbBt709 = mat3x3<f32>(
            vec3f(1.0, 1.0, 1.0),
            vec3f(0.0, -0.187324, 1.8556),
            vec3f(1.5748, -0.468124, 0.0)
        );

        let rgb = yuvToRgbBt709 * vec3f(y, u, v);
        return vec4<f32>(rgb, 1.0);
    }
"""次にUniformのバッファーを作っているコードまで移動して、構造体の中身が増えたためサイズを修正します。
今回はもう一つmat4x4<f32>が追加されたので64を2倍すればよいですね!
// CPU から値を渡す準備
transformMatrixUniformBuffer = device.createBuffer(
    GPUBufferDescriptor(
        size = 64 * 2, // mat4x4<f32> が2つあるので
        usage = BufferUsage.Uniform or BufferUsage.CopyDst
    )
)最後にrender()関数の変換行列を作っている箇所まで移動し、新たにテクスチャ座標に適用する変換行列を作り、writeBuffer()します。structに2つmat4x4があり、これをどうやってCPUから渡せばいいのかと言うと単にバイト配列を連結するだけです。Kotlinには演算子オーバーロードがありFloatArray + FloatArrayが出来るので、つなげてJavaのByteBufferにするだけ!楽!
// 変換行列を用意
// 三角形が歪まないようにする
val transformMatrix = FloatArray(16)
Matrix.setIdentityM(transformMatrix, 0)
// WebGPU 側を正方形にする、SurfaceView は画面いっぱいなので縦長のママだが、見切れる前提で正方形にする。これで三角形が歪まなくなる
if (width < height) {
    val scale = (height / width.toFloat())
    Matrix.scaleM(transformMatrix, 0, scale, 1f, 1f)
} else {
    val scale = (width / height.toFloat())
    Matrix.scaleM(transformMatrix, 0, 1f, scale, 1f)
}
// 小さくする
Matrix.scaleM(transformMatrix, 0, .5f, .5f, .5f)
// テクスチャに適用する変換行列
// カメラが回転している + 反転もしている(多分既に回転されてる状態なので Y 軸に対して反転をする必要が?)
val textureTransformMatrix = FloatArray(16)
Matrix.setIdentityM(textureTransformMatrix, 0)
Matrix.setRotateM(textureTransformMatrix, 0, 270f, 0f, 0f, 1f)
Matrix.scaleM(textureTransformMatrix, 0, 1f, -1f, 1f)
// GPU に転送
// mat4x4<f32> が2つある構造体なので足す
val structFloatArray = transformMatrix + textureTransformMatrix
gpu.device.queue.writeBuffer(transformMatrixUniformBuffer, 0, structFloatArray.toByteBuffer())
これでカメラの回転は修正されたと思います!
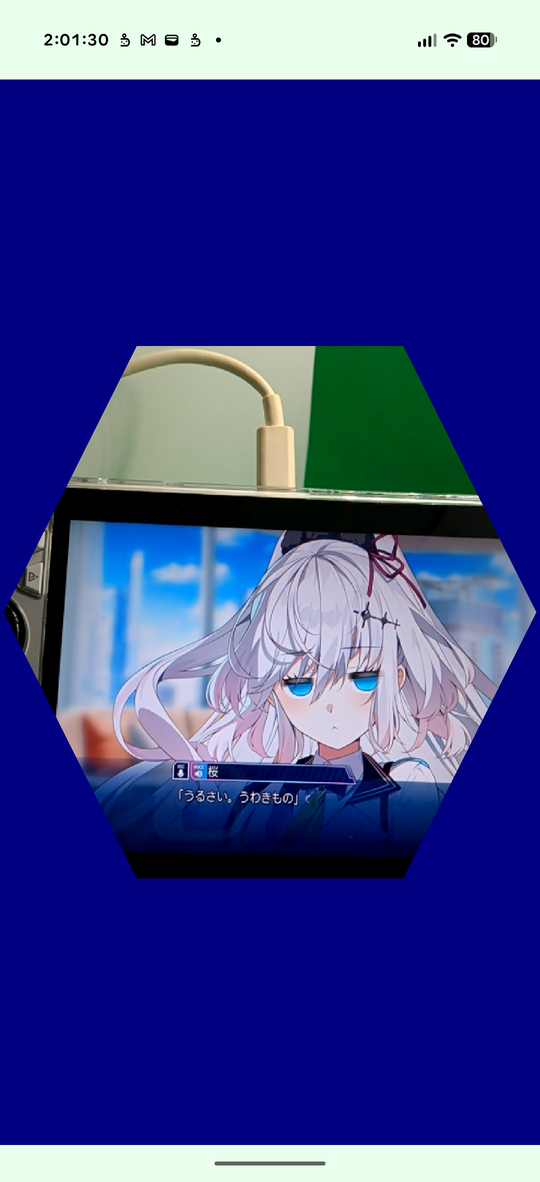
そもそも一体なぜこうなっているかというと、三角形の頂点をテクスチャ座標としても使っているから。
以下のように、一つ目の三角形は、左端X座標 -0.5fから右端 X座標 0.5fなのに対して、二つ目の三角形は左端 X座標 0.5fから右端 X座標 1.0になっている。
三角形の位置としては並べたいので正しいが、三角形にすべて同じテクスチャを描画する場合はX座標がズレてるといけないですね。
// 下 真ん中
0.0f, 0.0f,
-0.5f, -1.0f,
0.5f, -1.0f,

// 下 右
0.0f, 0.0f,
0.5f, -1.0f,
1.0f, 0.0f,
いやマジで説明が難しいな。
画像で説明する、極端に横に二つ並べるとこう。今の段階では頂点の位置をテクスチャ座標として利用しようとしている。
このせいで、それぞれの三角形で同じ画像が出ず、切り抜いたというか、、なんだろう、水玉コラみたいな(???)。
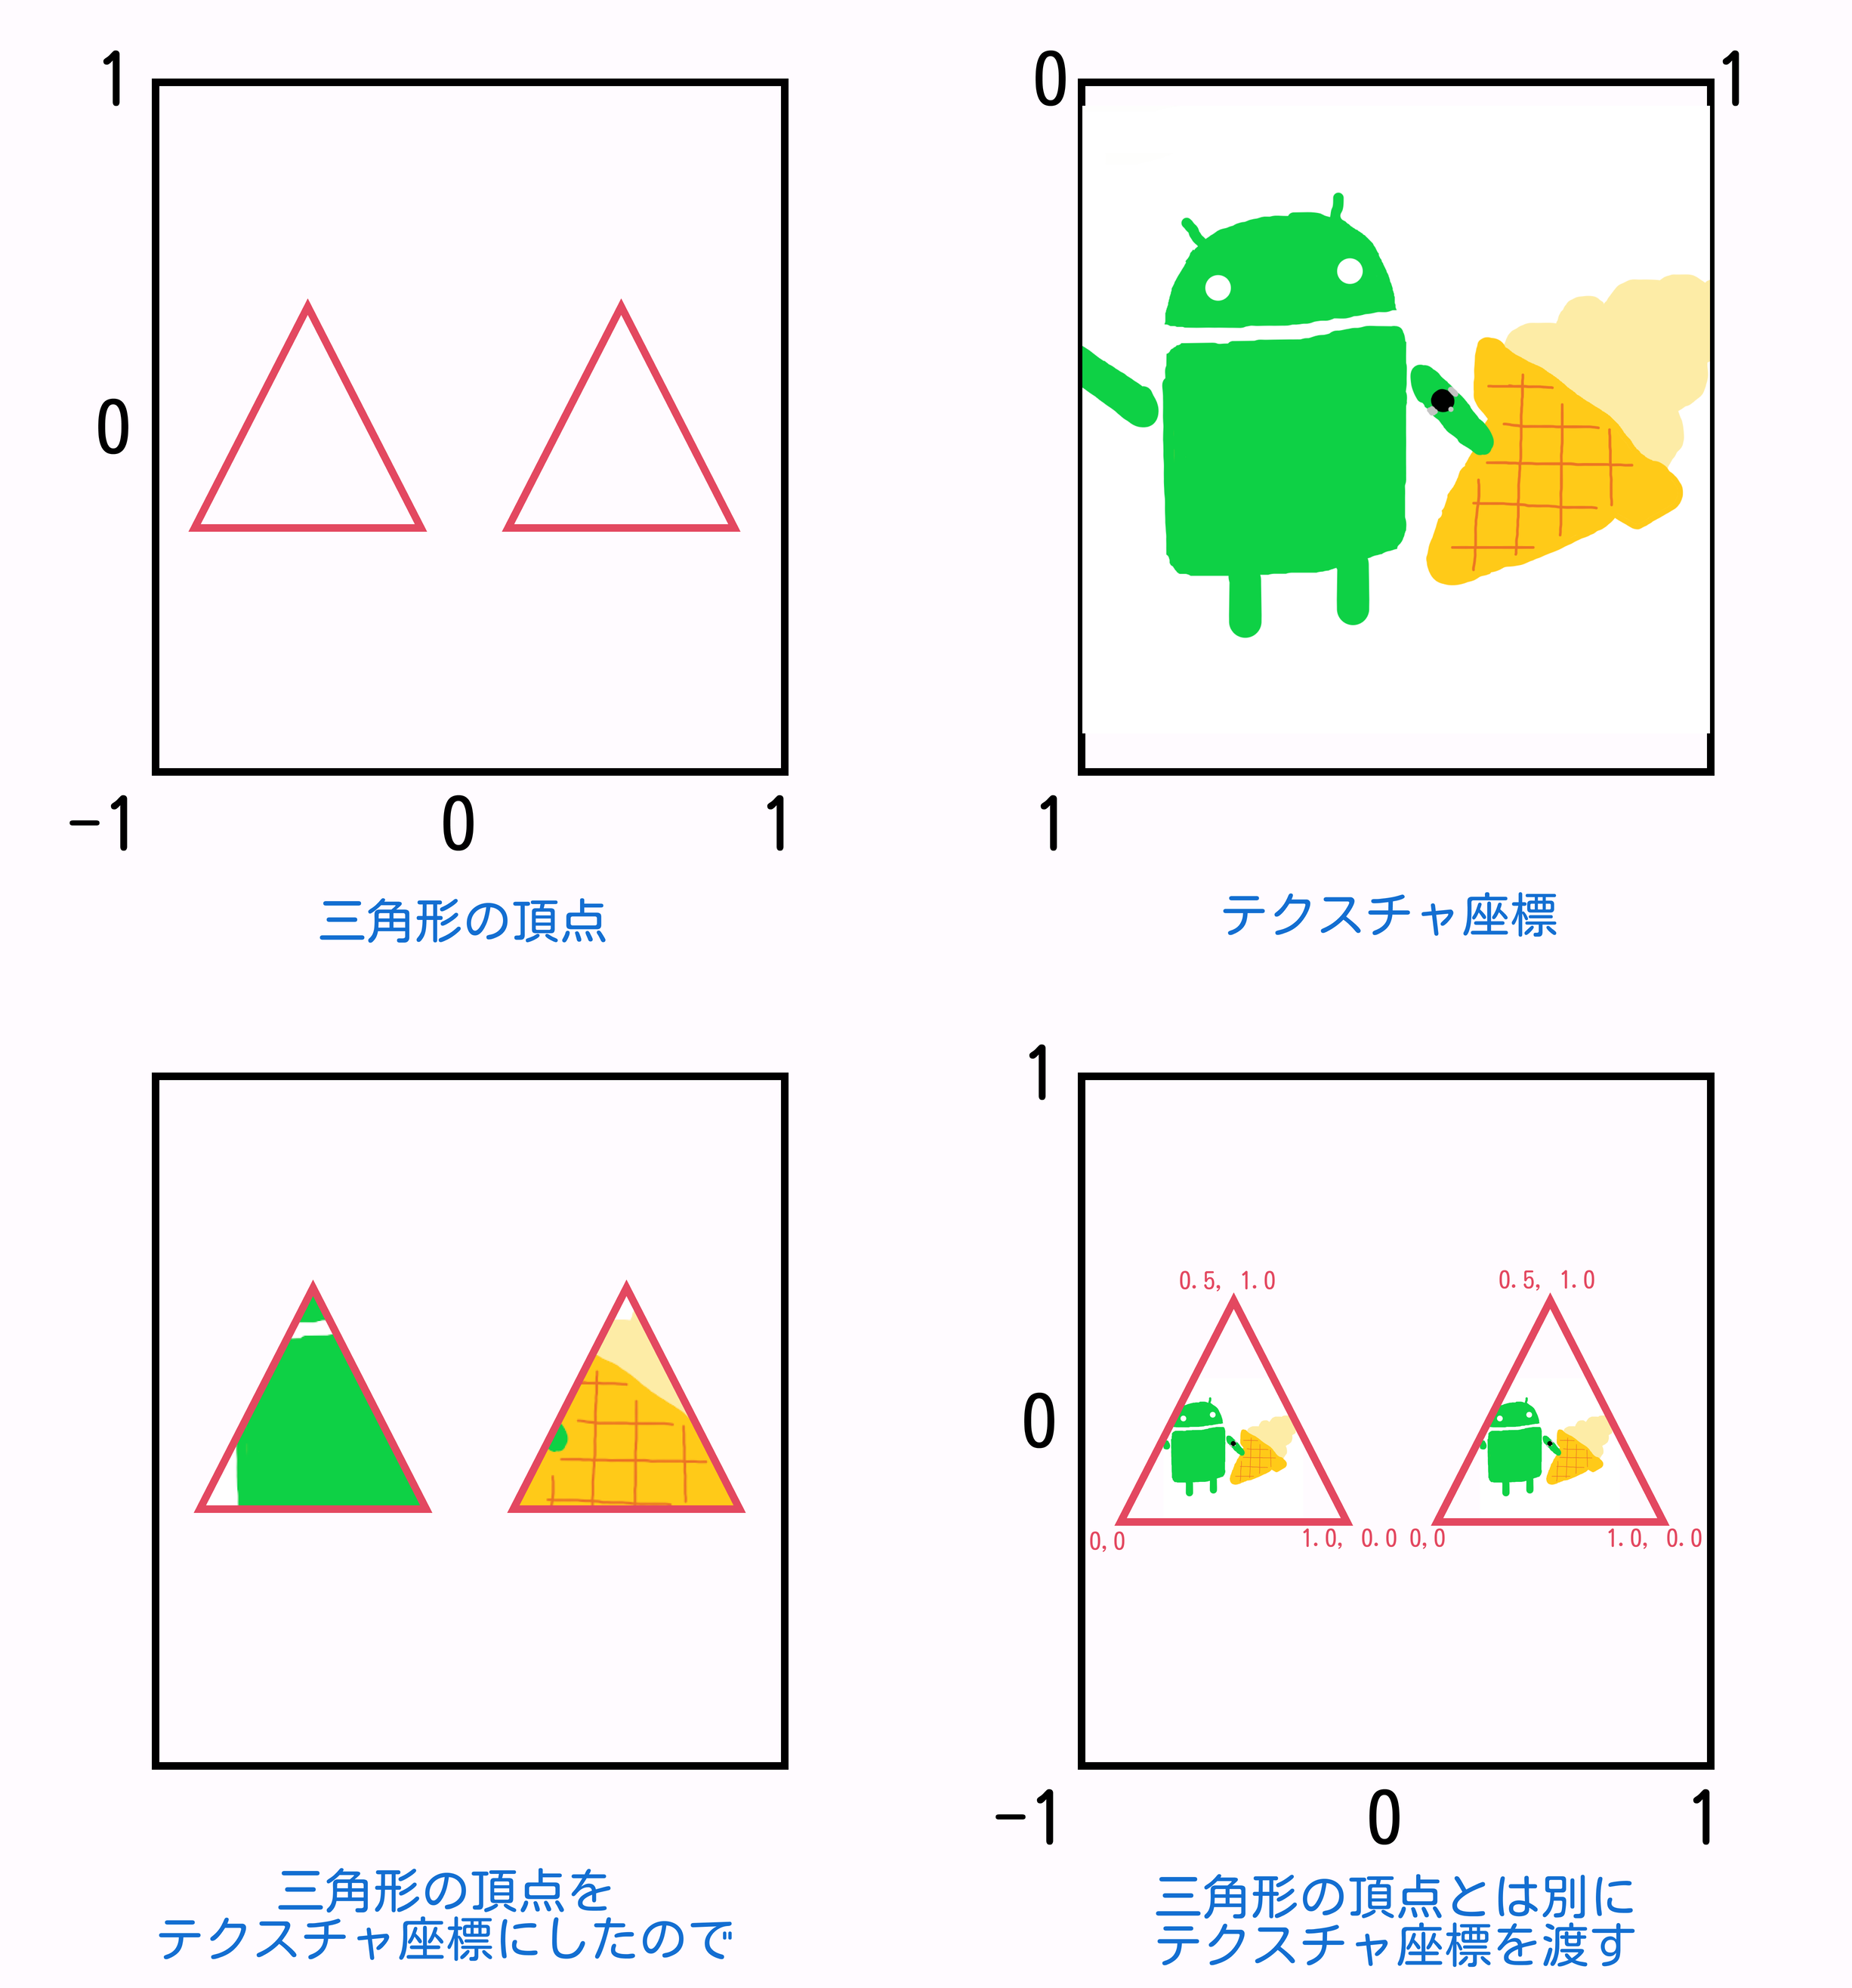
なので、多分一般的なのは、三角形の頂点とは別にテクスチャ座標を別に渡すのが良いと思います。
というわけで渡します。見ての通り三角形の頂点は三角形を並べるのでそのまま、テクスチャ座標はそれぞれの三角形が同じ画像になるように同じ値を渡しています。先述の通りそれぞれの三角形で同じテクスチャを描画するためです
private val VERTEX_ARRAY = floatArrayOf(
    // それぞれ X座標、Y座標、テクスチャX座標、 テクスチャY座標

    // 下 真ん中
    0.0f, 0.0f, 0.5f, 1.0f,
    -0.5f, -1.0f, 0f, 0f,
    0.5f, -1.0f, 1.0f, 0f,

    // 下 右
    0.0f, 0.0f, 0.5f, 1.0f,
    0.5f, -1.0f, 0f, 0f,
    1.0f, 0.0f, 1.0f, 0f,

    // 下 左
    0.0f, 0.0f, 0.5f, 1.0f,
    -1.0f, 0.0f, 0f, 0f,
    -0.5f, -1.0f, 1.0f, 0f,

    // 上 真ん中
    0.0f, 0.0f, 0.5f, 1.0f,
    -0.5f, 1.0f, 0f, 0f,
    0.5f, 1.0f, 1.0f, 0f,

    // 上 右
    0.0f, 0.0f, 0.5f, 1.0f,
    0.5f, 1.0f, 0f, 0f,
    1.0f, 0.0f, 1.0f, 0f,

    // 上 左
    0.0f, 0.0f, 0.5f, 1.0f,
    -0.5f, 1.0f, 0f, 0f,
    -1.0f, 0.0f, 1.0f, 0f,
)次に、device.createRenderPipeline()のコードまで移動して、バーテックスシェーダーの引数でテクスチャ座標の値を受け取れるようにします。型としてはvec2fになりますね。x,yなので!VERTEX_ARRAYのx,yの後の2つがテクスチャ座標のX/Yなので、そうするように指示します。
arrayStrideは、X,Yのvec2fで2 * Float.SIZE_BYTES消費しているので、vec2fが増えたらそれに加えて二倍すればよいですね。GPUVertexAttributeでテクスチャ座標 vec2fを新設します。offsetは頂点のvec2fのバイトサイズを飛ばしたらテクスチャ座標のvec2fが得られますのでそうします。
// Create Render Pipeline
renderPipeline = device.createRenderPipeline(
    descriptor = GPURenderPipelineDescriptor(
        vertex = GPUVertexState(
            shaderModule,
            // 頂点を
            buffers = arrayOf(
                GPUVertexBufferLayout(
                    arrayStride = Float.SIZE_BYTES * 4L, // 頂点(x,y) とテクスチャ座標(x,y) で 2 * 2 * FloatSize
                    attributes = arrayOf(
                        // 三角形の頂点
                        GPUVertexAttribute(
                            shaderLocation = 0,
                            offset = 0,
                            format = VertexFormat.Float32x2
                        ),
                        // テクスチャ座標
                        GPUVertexAttribute(
                            shaderLocation = 1,
                            offset = Float.SIZE_BYTES * 2L,
                            format = VertexFormat.Float32x2
                        )
                    )
                )
            )
        ),
        fragment = GPUFragmentState(
            shaderModule,
            targets = arrayOf(GPUColorTargetState(TextureFormat.RGBA8Unorm))
        ),
        primitive = GPUPrimitiveState(PrimitiveTopology.TriangleList),
    )
)つぎにシェーダーを修正します。バーテックスシェーダーから三角形の頂点に加えてテクスチャ座標を受け取るようにします。
テクスチャ座標を受け取って、先述のテクスチャ座標に適用する変換行列を掛け算します。この時vec2fとmat4x4で直接掛け算できないため、vec2fをvec4fにしています。vec4fにした都合上なんか戻さないといけなくなってしまったので* 0.5 + 0.5は引き続き・・・
    private fun initPipeline(device: GPUDevice) {
        val shaderCode = """
    // Uniforms 構造体
    struct Uniforms {
        matrix: mat4x4<f32>,
        textureMatrix: mat4x4<f32>,
    }

    // CPU から頂点を受け取る
    struct Vertex {
        @location(0) position: vec2f,
        @location(1) uv: vec2f,
    }

    // フラグメントシェーダーへ渡す
    struct VertexOutput {
        @builtin(position) position: vec4f,
        @location(0) uv : vec2f,
    }

    // CPU から受け取る
    @group(0) @binding(0) var<uniform> transformMatrix: Uniforms;
    @group(0) @binding(1) var smp: sampler;
    @group(0) @binding(2) var textureYuvY: texture_2d<f32>;
    @group(0) @binding(3) var textureYuvU: texture_2d<f32>;
    @group(0) @binding(4) var textureYuvV: texture_2d<f32>;

    @vertex fn vs_main(vertex: Vertex) -> VertexOutput {
        let transformedVec = vec4f(vertex.position, 0, 1) * transformMatrix.matrix; // 変換行列を適用
        let uvVec4 = vec4f(vertex.uv, 0, 1) * transformMatrix.textureMatrix; // mat4x4 の変換行列を適用するために vec4f() にする
        var output: VertexOutput;
        output.position = transformedVec;
        output.uv = uvVec4.xy * 0.5 + 0.5; // vec4f にしてしまったのでテクスチャ座標にもどす
        return output;
    }

    @fragment fn fs_main(output: VertexOutput) -> @location(0) vec4f {

        // 位置に対応する YUV とりだし
        // 以下、Yの値域は[0, 1]。Cb, Crの値域は[-0.5, 0.5]
        let y = (textureSample(textureYuvY, smp, output.uv).r * (255.0 / 235.0) - (16.0 / 235.0));
        let u = (textureSample(textureYuvU, smp, output.uv).r - 0.5);
        let v = (textureSample(textureYuvV, smp, output.uv).r - 0.5);

        // YUV から BT.709 RGB の変換式は Wiki
        // https://ja.wikipedia.org/wiki/YUV#RGBからの変換
        let yuvToRgbBt709 = mat3x3<f32>(
            vec3f(1.0, 1.0, 1.0),
            vec3f(0.0, -0.187324, 1.8556),
            vec3f(1.5748, -0.468124, 0.0)
        );

        let rgb = yuvToRgbBt709 * vec3f(y, u, v);
        return vec4<f32>(rgb, 1.0);
    }
"""最後にdraw()の部分、2で割ることで三角形の頂点の数を出していましたが、頂点の数だけx,y,テクスチャx,テクスチャyのデータがあるため、4で割る必要があります。
renderPass.setPipeline(renderPipeline)
renderPass.setVertexBuffer(0, vertexBuffer)
renderPass.setBindGroup(0, bindGroup) // @group(0) なので 0
renderPass.draw(VERTEX_ARRAY.size / 4) // 頂点の数だけ x,y,テクスチャx,テクスチャy のデータがあるため割り算
renderPass.end()
ついに!できた!!!!!!!!!!
同じテクスチャが描画されていますね!
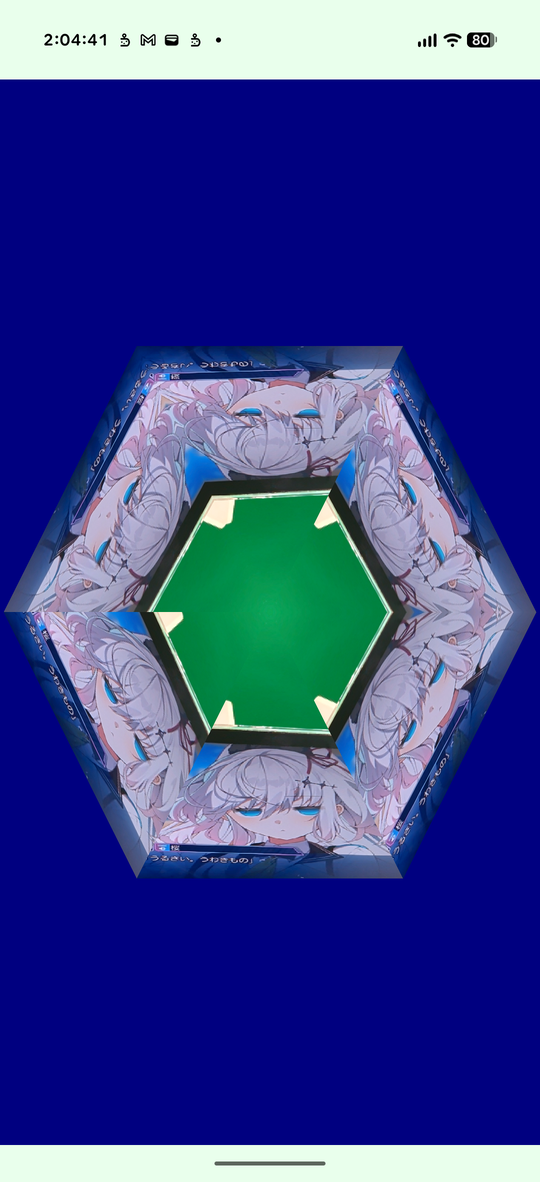
ちょっと面白いですねこれ(手前味噌)
WebGPU、マジでいいな。エラーが遥かに分かりやすい。
class MainActivity : ComponentActivity() {
    override fun onCreate(savedInstanceState: Bundle?) {
        super.onCreate(savedInstanceState)
        enableEdgeToEdge()
        setContent {
            AndroidWebGpuMangekyouTheme {
                Scaffold(modifier = Modifier.fillMaxSize()) { innerPadding ->
                    MangekyouGpuSurfaceView(modifier = Modifier.padding(innerPadding))
                }
            }
        }
    }
}

@Composable
fun MangekyouGpuSurfaceView(modifier: Modifier = Modifier) {
    val surfaceSize = remember { MutableStateFlow<IntSize?>(null) }
    val surfaceFlow = remember { MutableStateFlow<Surface?>(null) }

    val context = LocalContext.current
    val isPermissionGranted = remember { Channel<Boolean>() }
    val permissionRequester = rememberLauncherForActivityResult(
        contract = ActivityResultContracts.RequestPermission(),
        onResult = { isGranted ->
            isPermissionGranted.trySend(isGranted)
        }
    )

    LaunchedEffect(key1 = Unit) {
        // 権限を要求して待つ
        permissionRequester.launch(android.Manifest.permission.CAMERA)
        if (!isPermissionGranted.receive()) {
            println("権限が付与されませんでした...")
        }

        // サイズと surface が得られること、得られない場合は return している
        combine(
            surfaceSize,
            surfaceFlow,
            ::Pair
        ).collectLatest { (size, surface) ->
            if (size != null && surface != null) {
                val renderer = MangekyouWebGpuRenderer(context)
                try {
                    renderer.init(surface, size.width, size.height)
                    // 繰り返し呼ぶ
                    while (true) {
                        delay(16.milliseconds)
                        renderer.render()
                    }
                } finally {
                    // surface が再生成された、破棄されたとき
                    renderer.cleanup()
                }
            }
        }
    }

    AndroidView(
        modifier = modifier.onSizeChanged { surfaceSize.value = it },
        factory = { context ->
            SurfaceView(context).apply {
                holder.addCallback(object : SurfaceHolder.Callback {
                    override fun surfaceChanged(holder: SurfaceHolder, format: Int, width: Int, height: Int) {
                        // do nothing
                    }

                    override fun surfaceCreated(holder: SurfaceHolder) {
                        surfaceFlow.value = holder.surface
                    }

                    override fun surfaceDestroyed(holder: SurfaceHolder) {
                        surfaceFlow.value = null
                    }
                })
            }
        }
    )
}
class MangekyouWebGpuRenderer(private val context: Context) {
private lateinit var webGpu: WebGpu
private lateinit var renderPipeline: GPURenderPipeline
private lateinit var vertexBuffer: GPUBuffer
// 変換行列を渡す
private lateinit var transformMatrixUniformBuffer: GPUBuffer
private lateinit var bindGroup: GPUBindGroup
private var width = 0
private var height = 0
// カメラの映像を得る
private val latestImageChannel = Channel<Image>(capacity = Channel.CONFLATED, onUndeliveredElement = { it.close() })
private var imageReader: ImageReader? = null
private var cameraDevice: CameraDevice? = null
private val cameraExecutor = Executors.newSingleThreadExecutor()
// WebGPU テクスチャ
private lateinit var sampler: GPUSampler
private lateinit var textureYuvY: GPUTexture
private lateinit var textureYuvU: GPUTexture
private lateinit var textureYuvV: GPUTexture
suspend fun init(surface: Surface, width: Int, height: Int) {
this.width = width
this.height = height
// 1. Create Instance & Device
webGpu = createWebGpu(surface)
val device = webGpu.device
// 2. Setup Pipeline (compile shaders)
initPipeline(device)
// 3. Configure the Surface
webGpu.webgpuSurface.configure(
GPUSurfaceConfiguration(
device,
width,
height,
TextureFormat.RGBA8Unorm,
)
)
// camera2 api init
initCamera2Api()
}
suspend fun render() {
if (!::webGpu.isInitialized) {
return
}
val gpu = webGpu
// YUV を受け取って GPU に転送する処理
val image = latestImageChannel.receive()
val yuvY = image.planes[0].buffer
val yuvU = image.planes[1].fixIfInterleaveRePutPlane(CAMERA_WIDTH, CAMERA_HEIGHT)
val yuvV = image.planes[2].fixIfInterleaveRePutPlane(CAMERA_WIDTH, CAMERA_HEIGHT)
image.close()
// YUV を GPU に送信
val yuvUvWidth = CAMERA_WIDTH / 2
val yuvUvHeight = CAMERA_HEIGHT / 2
webGpu.device.queue.writeTexture(
destination = GPUTexelCopyTextureInfo(textureYuvY),
data = yuvY,
writeSize = GPUExtent3D(CAMERA_WIDTH, CAMERA_HEIGHT),
dataLayout = GPUTexelCopyBufferLayout(bytesPerRow = CAMERA_WIDTH) // 1ピクセル1バイトしか使ってない (TextureFormat.R8Unorm)
)
webGpu.device.queue.writeTexture(
destination = GPUTexelCopyTextureInfo(textureYuvU),
data = yuvU,
writeSize = GPUExtent3D(yuvUvWidth, yuvUvHeight),
dataLayout = GPUTexelCopyBufferLayout(bytesPerRow = yuvUvWidth)
)
webGpu.device.queue.writeTexture(
destination = GPUTexelCopyTextureInfo(textureYuvV),
data = yuvV,
writeSize = GPUExtent3D(yuvUvWidth, yuvUvHeight),
dataLayout = GPUTexelCopyBufferLayout(bytesPerRow = yuvUvWidth)
)
// 変換行列を用意
// 三角形が歪まないようにする
val transformMatrix = FloatArray(16)
Matrix.setIdentityM(transformMatrix, 0)
// WebGPU 側を正方形にする、SurfaceView は画面いっぱいなので縦長のママだが、見切れる前提で正方形にする。これで三角形が歪まなくなる
if (width < height) {
val scale = (height / width.toFloat())
Matrix.scaleM(transformMatrix, 0, scale, 1f, 1f)
} else {
val scale = (width / height.toFloat())
Matrix.scaleM(transformMatrix, 0, 1f, scale, 1f)
}
// 小さくする
Matrix.scaleM(transformMatrix, 0, .5f, .5f, .5f)
// テクスチャに適用する変換行列
// カメラが回転している + 反転もしている(多分既に回転されてる状態なので Y 軸に対して反転をする必要が?)
val textureTransformMatrix = FloatArray(16)
Matrix.setIdentityM(textureTransformMatrix, 0)
Matrix.setRotateM(textureTransformMatrix, 0, 270f, 0f, 0f, 1f)
Matrix.scaleM(textureTransformMatrix, 0, 1f, -1f, 1f)
// GPU に転送
// mat4x4<f32> が2つある構造体なので足す
val structFloatArray = transformMatrix + textureTransformMatrix
gpu.device.queue.writeBuffer(transformMatrixUniformBuffer, 0, structFloatArray.toByteBuffer())
// 1. Get the next available texture from the screen
val surfaceTexture = gpu.webgpuSurface.getCurrentTexture()
// 2. Create a command encoder
val commandEncoder = gpu.device.createCommandEncoder()
// 3. Begin a render pass (clearing the screen to blue)
val renderPass = commandEncoder.beginRenderPass(
GPURenderPassDescriptor(
colorAttachments = arrayOf(
GPURenderPassColorAttachment(
GPUColor(0.0, 0.0, 0.5, 1.0),
surfaceTexture.texture.createView(),
loadOp = LoadOp.Clear,
storeOp = StoreOp.Store,
)
)
)
)
// 4. Draw
renderPass.setPipeline(renderPipeline)
renderPass.setVertexBuffer(0, vertexBuffer)
renderPass.setBindGroup(0, bindGroup) // @group(0) なので 0
renderPass.draw(VERTEX_ARRAY.size / 4) // 頂点の数だけ x,y,テクスチャx,テクスチャy のデータがあるため割り算
renderPass.end()
// 5. Submit and Present
gpu.device.queue.submit(arrayOf(commandEncoder.finish()))
gpu.webgpuSurface.present()
}
fun cleanup() {
if (::webGpu.isInitialized) {
webGpu.close()
}
cameraDevice?.close()
imageReader?.close()
}
private fun FloatArray.toByteBuffer(): ByteBuffer {
val bufferSize = this.size * Float.SIZE_BYTES
val byteBuffer = ByteBuffer.allocateDirect(bufferSize)
.order(ByteOrder.nativeOrder())
.also { byteBuffer -> byteBuffer.asFloatBuffer().put(this).rewind() }
return byteBuffer
}
private fun initPipeline(device: GPUDevice) {
val shaderCode = """
// Uniforms 構造体
struct Uniforms {
matrix: mat4x4<f32>,
textureMatrix: mat4x4<f32>,
}
// CPU から頂点を受け取る
struct Vertex {
@location(0) position: vec2f,
@location(1) uv: vec2f,
}
// フラグメントシェーダーへ渡す
struct VertexOutput {
@builtin(position) position: vec4f,
@location(0) uv : vec2f,
}
// CPU から受け取る
@group(0) @binding(0) var<uniform> transformMatrix: Uniforms;
@group(0) @binding(1) var smp: sampler;
@group(0) @binding(2) var textureYuvY: texture_2d<f32>;
@group(0) @binding(3) var textureYuvU: texture_2d<f32>;
@group(0) @binding(4) var textureYuvV: texture_2d<f32>;
@vertex fn vs_main(vertex: Vertex) -> VertexOutput {
let transformedVec = vec4f(vertex.position, 0, 1) * transformMatrix.matrix; // 変換行列を適用
let uvVec4 = vec4f(vertex.uv, 0, 1) * transformMatrix.textureMatrix; // mat4x4 の変換行列を適用するために vec4f() にする
var output: VertexOutput;
output.position = transformedVec;
output.uv = uvVec4.xy * 0.5 + 0.5; // vec4f にしてしまったのでテクスチャ座標にもどす
return output;
}
@fragment fn fs_main(output: VertexOutput) -> @location(0) vec4f {
// 位置に対応する YUV とりだし
// 以下、Yの値域は[0, 1]。Cb, Crの値域は[-0.5, 0.5]
let y = (textureSample(textureYuvY, smp, output.uv).r * (255.0 / 235.0) - (16.0 / 235.0));
let u = (textureSample(textureYuvU, smp, output.uv).r - 0.5);
let v = (textureSample(textureYuvV, smp, output.uv).r - 0.5);
// YUV から BT.709 RGB の変換式は Wiki
// https://ja.wikipedia.org/wiki/YUV#RGBからの変換
let yuvToRgbBt709 = mat3x3<f32>(
vec3f(1.0, 1.0, 1.0),
vec3f(0.0, -0.187324, 1.8556),
vec3f(1.5748, -0.468124, 0.0)
);
let rgb = yuvToRgbBt709 * vec3f(y, u, v);
return vec4<f32>(rgb, 1.0);
}
"""
// Create Shader Module
val shaderModule = device.createShaderModule(
GPUShaderModuleDescriptor(shaderSourceWGSL = GPUShaderSourceWGSL(shaderCode))
)
// 頂点
vertexBuffer = device.createBuffer(
descriptor = GPUBufferDescriptor(
size = (VERTEX_ARRAY.size * Float.SIZE_BYTES).toLong(),
usage = BufferUsage.Vertex or BufferUsage.CopyDst
)
)
device.queue.writeBuffer(vertexBuffer, 0, VERTEX_ARRAY.toByteBuffer())
// Create Render Pipeline
renderPipeline = device.createRenderPipeline(
descriptor = GPURenderPipelineDescriptor(
vertex = GPUVertexState(
shaderModule,
// 頂点を
buffers = arrayOf(
GPUVertexBufferLayout(
arrayStride = Float.SIZE_BYTES * 4L, // 頂点(x,y) とテクスチャ座標(x,y) で 2 * 2 * FloatSize
attributes = arrayOf(
// 三角形の頂点
GPUVertexAttribute(
shaderLocation = 0,
offset = 0,
format = VertexFormat.Float32x2
),
// テクスチャ座標
GPUVertexAttribute(
shaderLocation = 1,
offset = Float.SIZE_BYTES * 2L,
format = VertexFormat.Float32x2
)
)
)
)
),
fragment = GPUFragmentState(
shaderModule,
targets = arrayOf(GPUColorTargetState(TextureFormat.RGBA8Unorm))
),
primitive = GPUPrimitiveState(PrimitiveTopology.TriangleList),
)
)
// CPU から値を渡す準備
transformMatrixUniformBuffer = device.createBuffer(
GPUBufferDescriptor(
size = 64 * 2, // mat4x4<f32> が2つあるので
usage = BufferUsage.Uniform or BufferUsage.CopyDst
)
)
// テクスチャ。よく考えると YUV それぞれは単色である、なので RGB も確保せずとも R だけで足りる
// U/V プレーンは半分
val textureUvWidth = CAMERA_WIDTH / 2
val textureUvHeight = CAMERA_HEIGHT / 2
sampler = webGpu.device.createSampler()
textureYuvY = webGpu.device.createTexture(
descriptor = GPUTextureDescriptor(
usage = TextureUsage.TextureBinding or TextureUsage.CopyDst,
size = GPUExtent3D(CAMERA_WIDTH, CAMERA_HEIGHT),
format = TextureFormat.R8Unorm
)
)
textureYuvU = webGpu.device.createTexture(
descriptor = GPUTextureDescriptor(
usage = TextureUsage.TextureBinding or TextureUsage.CopyDst,
size = GPUExtent3D(textureUvWidth, textureUvHeight),
format = TextureFormat.R8Unorm
)
)
textureYuvV = webGpu.device.createTexture(
descriptor = GPUTextureDescriptor(
usage = TextureUsage.TextureBinding or TextureUsage.CopyDst,
size = GPUExtent3D(textureUvWidth, textureUvHeight),
format = TextureFormat.R8Unorm
)
)
bindGroup = webGpu.device.createBindGroup(
descriptor = GPUBindGroupDescriptor(
layout = renderPipeline.getBindGroupLayout(0),
entries = arrayOf(
// 変換行列
GPUBindGroupEntry(binding = 0, buffer = transformMatrixUniformBuffer),
// テクスチャ
GPUBindGroupEntry(binding = 1, sampler = sampler),
GPUBindGroupEntry(binding = 2, textureView = textureYuvY.createView()),
GPUBindGroupEntry(binding = 3, textureView = textureYuvU.createView()),
GPUBindGroupEntry(binding = 4, textureView = textureYuvV.createView()),
)
)
)
}
@SuppressLint("MissingPermission") // 権限チェックするべきです
private suspend fun initCamera2Api() {
// 出力先の ImageReader、カメラ映像は Channel で別の関数へおくる
imageReader = ImageReader.newInstance(CAMERA_WIDTH, CAMERA_HEIGHT, ImageFormat.YUV_420_888, 2)
imageReader?.setOnImageAvailableListener(
{ imageReader ->
latestImageChannel.trySend(element = imageReader?.acquireLatestImage() ?: return@setOnImageAvailableListener)
},
null
)
// Camera2API
val cameraManager = context.getSystemService(Context.CAMERA_SERVICE) as CameraManager
val (frontCameraId, _) = cameraManager
.cameraIdList
.map { cameraId -> cameraId to cameraManager.getCameraCharacteristics(cameraId) }
.firstOrNull { (_, characteristic) -> characteristic.get(CameraCharacteristics.LENS_FACING) == CameraCharacteristics.LENS_FACING_BACK } ?: return
cameraDevice = suspendCancellableCoroutine { cont ->
cameraManager.openCamera(frontCameraId, object : CameraDevice.StateCallback() {
override fun onOpened(device: CameraDevice) {
cont.resume(device)
}
override fun onDisconnected(device: CameraDevice) {
cont.resume(null)
}
override fun onError(device: CameraDevice, error: Int) {
cont.resume(null)
}
}, null)
}
cameraDevice ?: return
val captureRequest = cameraDevice!!.createCaptureRequest(CameraDevice.TEMPLATE_PREVIEW).apply {
addTarget(imageReader!!.surface)
}
val captureSession = suspendCancellableCoroutine { continuation ->
// OutputConfiguration を作る
val outputConfigurationList = listOf(OutputConfiguration(imageReader!!.surface))
val sessionConfiguration = SessionConfiguration(SessionConfiguration.SESSION_REGULAR, outputConfigurationList, cameraExecutor, object : CameraCaptureSession.StateCallback() {
override fun onConfigured(captureSession: CameraCaptureSession) {
continuation.resume(captureSession)
}
override fun onConfigureFailed(p0: CameraCaptureSession) {
continuation.resume(null)
}
})
cameraDevice!!.createCaptureSession(sessionConfiguration)
}
captureSession ?: return
captureSession.setRepeatingRequest(captureRequest.build(), null, null)
}
private fun Image.Plane.fixIfInterleaveRePutPlane(yPlaneWidth: Int, yPlaneHeight: Int): ByteBuffer {
// U/V プレーンは Y プレーンの半分のサイズ
val uvPlaneWidth = yPlaneWidth / 2
val uvPlaneHeight = yPlaneHeight / 2
val result = ByteBuffer.allocateDirect(uvPlaneWidth * uvPlaneHeight)
// pixelStride が
// 1 の場合は、[ Y1,Y2,Y3,Y4 ] のように、バイト配列に連続してデータが入っている
// 2 とかの場合、U/V プレーンを別々に取得しても、[ U1,V1,U2,V2 ] のように、一つのバイト配列に二種類のデータが交互に入っている(インターリーブ)
// 後者の場合はそのままでは WebGPU/OpenGLES のテクスチャとして使うことができないため、それぞれ切り離す必要がある
// ---
// また、後者の場合、実際には U/V 両方のデータが入っているため U/V プレーンは Y プレーンの半分。ですらない。
// それぞれのプレーンにすれば半分のサイズで収まります。
if (pixelStride == 1) {
buffer.put(result)
return result
}
// 例として [ U1, V1, U2 V2 Padding, U3, V3, U4, V4 ] の場合
// pixelStride が 2 になる。次の同じデータが 2 バイト先にあることを表している
// 二種類のデータとは別に、Padding が含まれていて、Padding 込みの横一列は rowStride で取得可能。基本的に Padding で次の横一列になるハズ
repeat(uvPlaneHeight) { y ->
// この行の先頭位置を rowStride から計算
val rowStartIdx = y * rowStride
// 2つ先を読む(1byte 飛ばして 1byte 読む)
for (x in 0 until uvPlaneWidth) {
val readPosition = rowStartIdx + (x * pixelStride)
// 一応
if (readPosition < buffer.capacity()) {
result.put(buffer[readPosition])
}
}
}
return result
}
companion object {
private const val CAMERA_WIDTH = 1280
private const val CAMERA_HEIGHT = 720
private val VERTEX_ARRAY = floatArrayOf(
// それぞれ X座標、Y座標、テクスチャX座標、 テクスチャY座標
// 下 真ん中
0.0f, 0.0f, 0.5f, 1.0f,
-0.5f, -1.0f, 0f, 0f,
0.5f, -1.0f, 1.0f, 0f,
// 下 右
0.0f, 0.0f, 0.5f, 1.0f,
0.5f, -1.0f, 0f, 0f,
1.0f, 0.0f, 1.0f, 0f,
// 下 左
0.0f, 0.0f, 0.5f, 1.0f,
-1.0f, 0.0f, 0f, 0f,
-0.5f, -1.0f, 1.0f, 0f,
// 上 真ん中
0.0f, 0.0f, 0.5f, 1.0f,
-0.5f, 1.0f, 0f, 0f,
0.5f, 1.0f, 1.0f, 0f,
// 上 右
0.0f, 0.0f, 0.5f, 1.0f,
0.5f, 1.0f, 0f, 0f,
1.0f, 0.0f, 1.0f, 0f,
// 上 左
0.0f, 0.0f, 0.5f, 1.0f,
-0.5f, 1.0f, 0f, 0f,
-1.0f, 0.0f, 1.0f, 0f,
)
}
}文字にして書くとやっぱおかしいよな、なんでPixel10 シリーズよりもPixel 9の方がGPU 性能よかったんだ。。。WebGPUはVulkanを叩いてくれるので!まあ実質Vulkanと言っていいのでは!?
Camera2APIからYUVのインターリーブされているデータをそれぞれのバイト配列に戻す処理とかも含まれていて、これはCPU性能によるので、GPUだけを計測するにはそもそも正確ではないことに注意する必要があります。
とりあえず繰り返し呼び出すrender()関数が何ミリ秒かかっているか計測します。
また、Jetpack Composeはリリースビルドで最高速度を出すので、デバッグ中ではあんまり参考にならないかも
(が、GPUに関してはリリースもデバッグも変わらないハズ。。。)
@Composable
fun MangekyouGpuSurfaceView(modifier: Modifier = Modifier) {
    val surfaceSize = remember { MutableStateFlow<IntSize?>(null) }
    val surfaceFlow = remember { MutableStateFlow<Surface?>(null) }

    val context = LocalContext.current
    val isPermissionGranted = remember { Channel<Boolean>() }
    val permissionRequester = rememberLauncherForActivityResult(
        contract = ActivityResultContracts.RequestPermission(),
        onResult = { isGranted ->
            isPermissionGranted.trySend(isGranted)
        }
    )

    val fps = remember { mutableStateOf("0 FPS") }

    LaunchedEffect(key1 = Unit) {
        // 権限を要求して待つ
        permissionRequester.launch(android.Manifest.permission.CAMERA)
        if (!isPermissionGranted.receive()) {
            println("権限が付与されませんでした...")
        }

        // サイズと surface が得られること、得られない場合は return している
        combine(
            surfaceSize,
            surfaceFlow,
            ::Pair
        ).collectLatest { (size, surface) ->
            if (size != null && surface != null) {
                val renderer = MangekyouWebGpuRenderer(context)
                try {
                    renderer.init(surface, size.width, size.height)
                    // 繰り返し呼ぶ
                    while (true) {
                        val time = measureTimeMillis {
                            delay(16.milliseconds)
                            renderer.render()
                        }
                        fps.value = ("${1000 / time} FPS")
                    }
                } finally {
                    // surface が再生成された、破棄されたとき
                    renderer.cleanup()
                }
            }
        }
    }

    Box {
        AndroidView(
            modifier = modifier.onSizeChanged { surfaceSize.value = it },
            factory = { context ->
                SurfaceView(context).apply {
                    holder.addCallback(object : SurfaceHolder.Callback {
                        override fun surfaceChanged(holder: SurfaceHolder, format: Int, width: Int, height: Int) {
                            // do nothing
                        }

                        override fun surfaceCreated(holder: SurfaceHolder) {
                            surfaceFlow.value = holder.surface
                        }

                        override fun surfaceDestroyed(holder: SurfaceHolder) {
                            surfaceFlow.value = null
                        }
                    })
                }
            }
        )

        Text(
            modifier = Modifier.statusBarsPadding(),
            text = fps.value,
            fontSize = 30.sp,
            color = Color.Red
        )
    }
}APK上の方に置いてあるので試してみたい方はどうぞ!
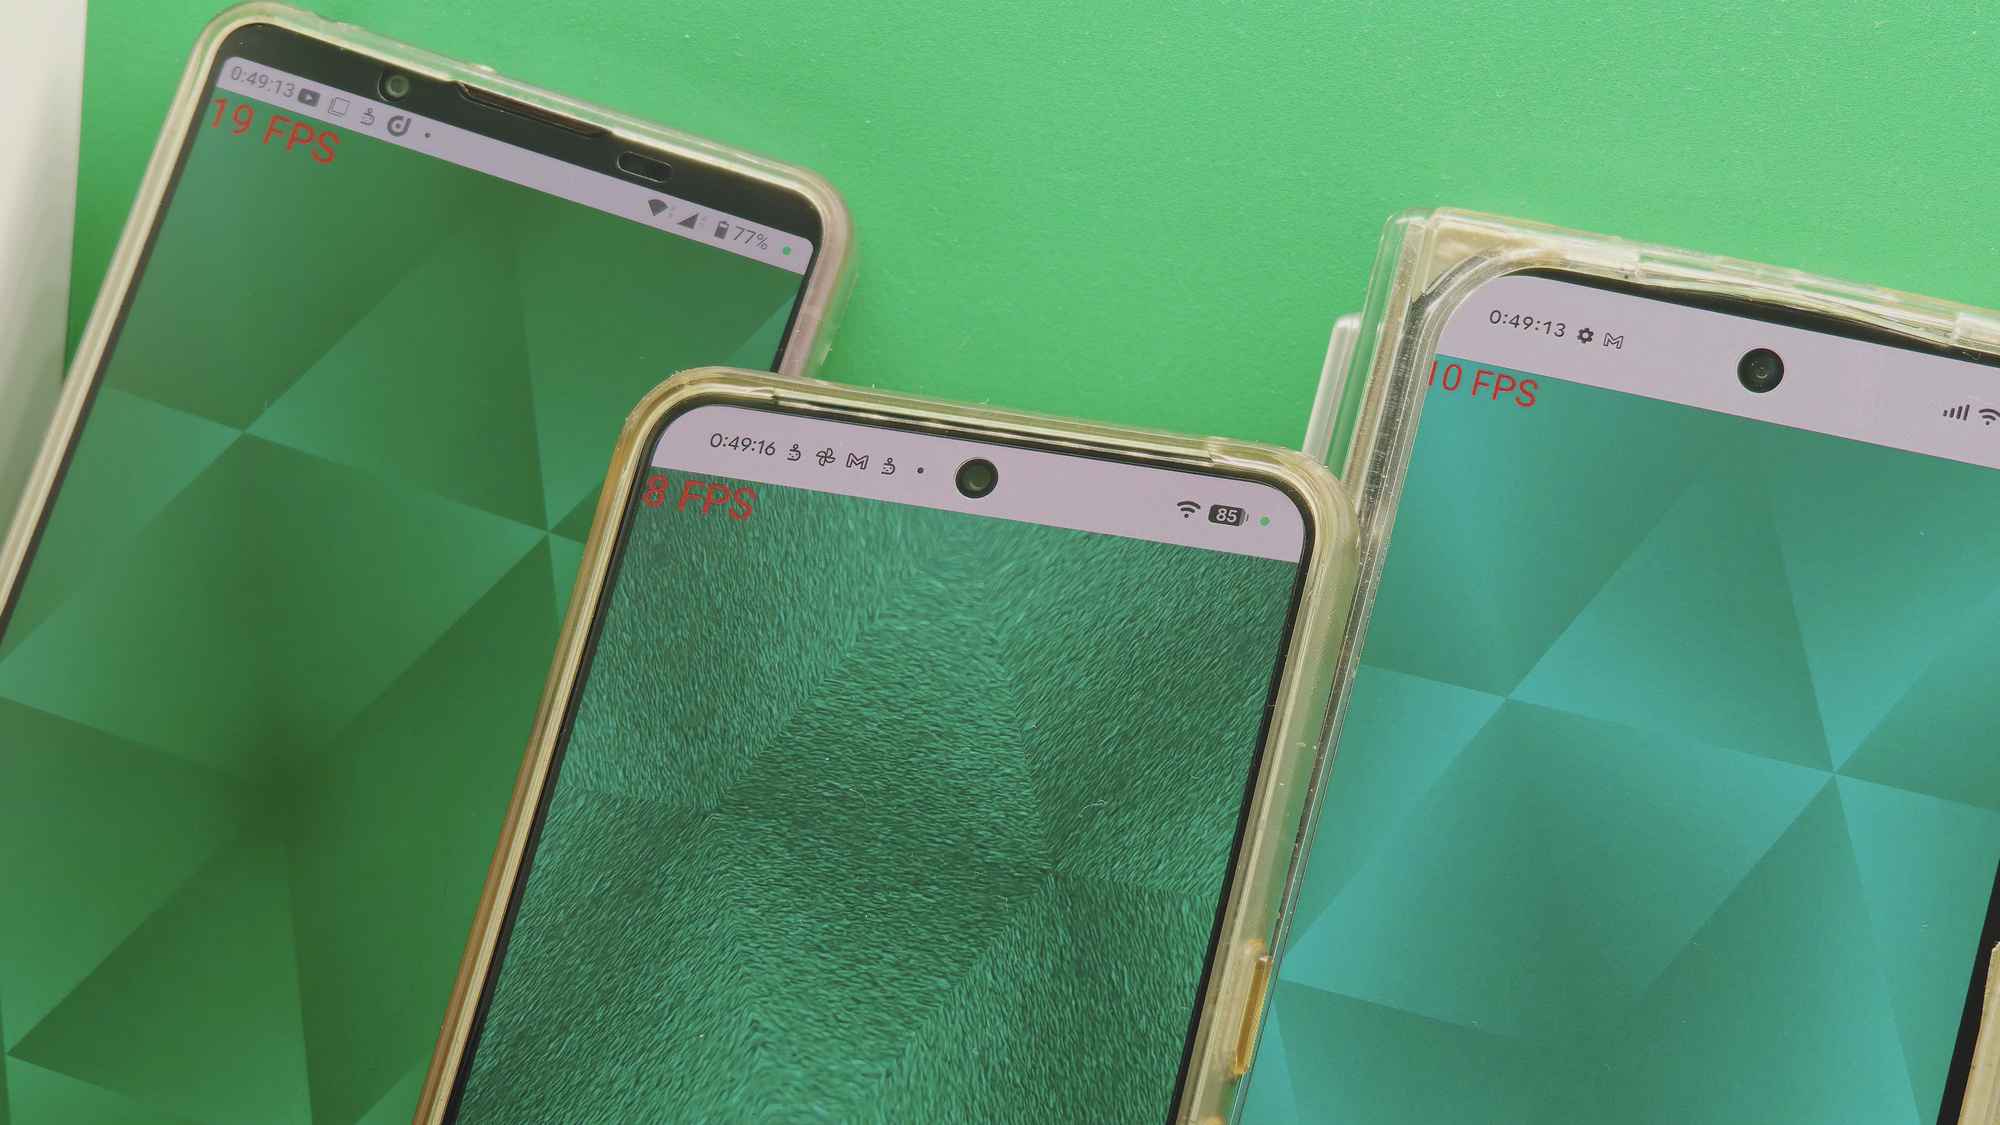
←Xperia 1 VII (Adreno)↑Pixel 8 Pro (Mali)→Pixel 10 Pro Fold (PowerVR)
結果ですが、Pixel 8 Pro も Pixel 10 Pro Fold もあんまり変わらず、Pixel 10 が1、2くらい高いくらい。ほんのちょっと高いくらいで変わらないと思う。OpenGL ESだとPixel 8 シリーズが速かったがVulkanだと健闘している?よく分からない。
端っこのXperiaはずっと18、19を行き来してました、というかこの程度でたったこれしか出ないのは普通に私が悪くね?
まあそもそもカメラ映像を渡す処理とかが入ってるので、再掲しますが正確な計測ではないです!!!
6個の三角形しか描画してないのであんまりおもしろくないかも。
三角形の数というか頂点は先述の通りVERTEX_ARRAYで定義しているので、ここで三角形を増やしたい場合は頂点を書き足せばよいですね。
もうちょっと頭がこんがらかってるので、VERTEX_ARRAYの続きだけはAIに書かせました、さーせん。
private val VERTEX_ARRAY = floatArrayOf(
    // それぞれ X座標、Y座標、テクスチャX座標、 テクスチャY座標

    // 下 真ん中
    0.0f, 0.0f, 0.5f, 1.0f,
    -0.5f, -1.0f, 0f, 0f,
    0.5f, -1.0f, 1.0f, 0f,

    // 下 右
    0.0f, 0.0f, 0.5f, 1.0f,
    0.5f, -1.0f, 0f, 0f,
    1.0f, 0.0f, 1.0f, 0f,

    // 下 左
    0.0f, 0.0f, 0.5f, 1.0f,
    -1.0f, 0.0f, 0f, 0f,
    -0.5f, -1.0f, 1.0f, 0f,

    // 上 真ん中
    0.0f, 0.0f, 0.5f, 1.0f,
    -0.5f, 1.0f, 0f, 0f,
    0.5f, 1.0f, 1.0f, 0f,

    // 上 右
    0.0f, 0.0f, 0.5f, 1.0f,
    0.5f, 1.0f, 0f, 0f,
    1.0f, 0.0f, 1.0f, 0f,

    // 上 左
    0.0f, 0.0f, 0.5f, 1.0f,
    -0.5f, 1.0f, 0f, 0f,
    -1.0f, 0.0f, 1.0f, 0f,

    // --- ここから追加分 ---、すいません続きは AI に書かせました

    0.0f, -2.0f, 0.5f, 1.0f,
    0.5f, -1.0f, 0f, 0f,
    -0.5f, -1.0f, 1.0f, 0f,

    1.5f, -1.0f, 0.5f, 1.0f,
    1.0f, 0.0f, 0f, 0f,
    0.5f, -1.0f, 1.0f, 0f,

    -1.5f, -1.0f, 0.5f, 1.0f,
    -0.5f, -1.0f, 0f, 0f,
    -1.0f, 0.0f, 1.0f, 0f,

    0.0f, 2.0f, 0.5f, 1.0f,
    0.5f, 1.0f, 0f, 0f,
    -0.5f, 1.0f, 1.0f, 0f,

    1.5f, 1.0f, 0.5f, 1.0f,
    1.0f, 0.0f, 0f, 0f,
    0.5f, 1.0f, 1.0f, 0f,

    -1.5f, 1.0f, 0.5f, 1.0f,
    -1.0f, 0.0f, 0f, 0f,
    -0.5f, 1.0f, 1.0f, 0f,

    0.0f, -2.0f, 0.5f, 1.0f,
    0.5f, -1.0f, 0f, 0f,
    1.0f, -2.0f, 1.0f, 0f,

    1.5f, -1.0f, 0.5f, 1.0f,
    1.0f, 0.0f, 0f, 0f,
    2.0f, 0.0f, 1.0f, 0f,

    1.5f, 1.0f, 0.5f, 1.0f,
    1.0f, 0.0f, 0f, 0f,
    2.0f, 0.0f, 1.0f, 0f,

    1.5f, 1.0f, 0.5f, 1.0f,
    0.5f, 1.0f, 0f, 0f,
    1.0f, 2.0f, 1.0f, 0f,

    0.0f, 2.0f, 0.5f, 1.0f,
    -0.5f, 1.0f, 0f, 0f,
    -1.0f, 2.0f, 1.0f, 0f,

    -1.5f, 1.0f, 0.5f, 1.0f,
    -1.0f, 0.0f, 0f, 0f,
    -2.0f, 0.0f, 1.0f, 0f,

    -1.5f, -1.0f, 0.5f, 1.0f,
    -1.0f, 0.0f, 0f, 0f,
    -2.0f, 0.0f, 1.0f, 0f,

    0.0f, -2.0f, 0.5f, 1.0f,
    -0.5f, -1.0f, 0f, 0f,
    -1.0f, -2.0f, 1.0f, 0f,

    1.5f, -1.0f, 0.5f, 1.0f,
    1.0f, -2.0f, 0f, 0f,
    0.5f, -1.0f, 1.0f, 0f,

    -1.5f, -1.0f, 0.5f, 1.0f,
    -0.5f, -1.0f, 0f, 0f,
    -1.0f, -2.0f, 1.0f, 0f,

    -1.5f, 1.0f, 0.5f, 1.0f,
    -0.5f, 1.0f, 0f, 0f,
    -1.0f, 2.0f, 1.0f, 0f,

    0.0f, 2.0f, 0.5f, 1.0f,
    1.0f, 2.0f, 0f, 0f,
    0.5f, 1.0f, 1.0f, 0f,
)どうぞ!
夏休みの自由研究はこれで決まり!(難しいので他を選びましょう)
つーかもう折り返し地点じゃねえか
仕事のせいでゲーム積みまくってる、ヤバい!
ロープラも買ってる
AndroidがWebフロントエンドからインスピレーションを受けてそうな技術
WebGPURemote ComposeReact Server ComponentsみたいなやつJetpack ComposeReact.jsだよマジでTailwindCSSに近いWeb技術を転用したいって?Jetpack Compose FlexBoxCSSにあるdisplay: flexをJetpack Composeで使えるようにしたものらしいCSS flexを雰囲気でつかってますがTailwindCSSでしか使ったことないので、CSS素そのままだったらつらいかもしれませんJetpack Compose GridCSSにあるdisplay: gridらしいCSSはflexしか使ったことないので使い心地はわからない...Jetpack Compose Strong skipping modeReact Compilerみたいなやつ、AndroidはデフォルトになったReactにあるReactQuery (なんか名前変わってた気がする)みたいなのAndroidに来てほしいなあと一瞬思ったけど、複雑なライフサイクルを持つAndroidには合わなさそうな気がしてきたので思ってないです。
Camera2 API利用中(?)にスクショを取ると音が出る!!!
ちゃんと塞がれてんのくさ